Print on demand fulfillment companies accept orders from merchants with designs they want printed on items like apparel, office and home goods. As a customer orders an item, the merchant sends the order with the artwork to the printer who then creates and ships the item to the customer.
Because shopping carts aren’t always able to store print details or send orders to a printer, merchants have to find a way to send order to their printers with the print details included. They also might need to split orders to send different items to different print companies.
Order Desk facilitates this process for merchants by downloading and splitting orders, syncing in the print details and submitting the orders to the right printers. This process can happen automatically and immediately once an Order Desk store is set up for it. The printer receives the order seconds after it was placed.
You can see our list of print on demand integrations with details about each company. This list is always growing, so if you use a print service you would like to see supported, contact Order Desk support and provide the service name, website and the API docs so our developers can review your request.
In this guide we’ll show you how to place an order with your printer manually to show you how the app works. Once you are familiar with what is happening, you can set up your Order Desk store to run automatically. This guide includes instructions for adding print details, splitting orders and setting up a store to submit orders to different printers.
First Steps
Connect Integrations
Enable your integrations from the Manage Integrations link in the left sidebar. You will find the print integrations under the Print on Demand tab.
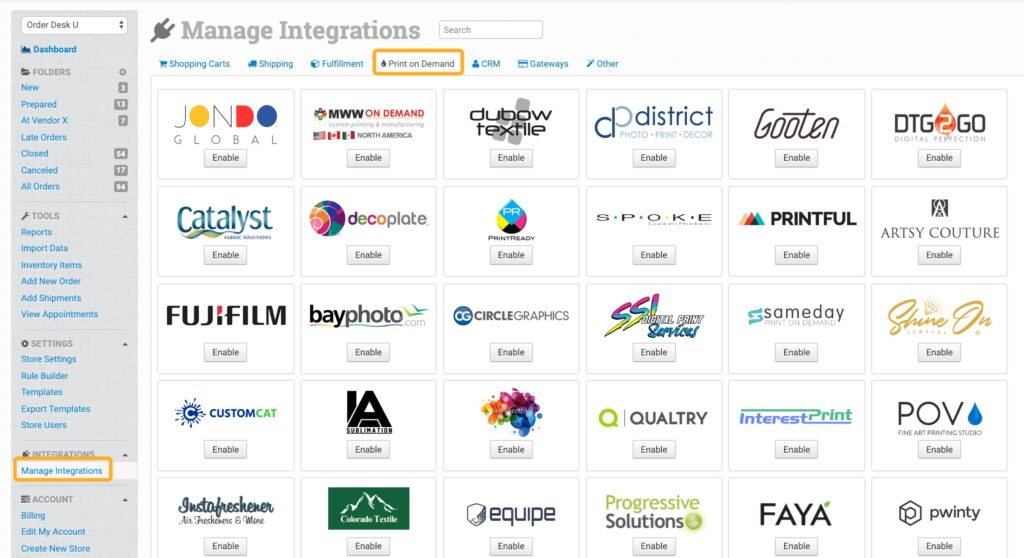
Click Enable for any integrations you need and fill in the details to connect. If you don’t know your credentials, contact your printer for help.
Most integrations have folder settings that let you choose which folder an order is moved into after it submits to an integration and when tracking is added from the integration, completing the order. Choose the folder, shipping and other settings you want for your store in each integration.
If you use Gooten, you can follow the rest of the instructions in this guide to learn how to set up your products in Order Desk, or refer to the Gooten guide to learn about an easier way to set up your products directly in Gooten and how that works with Order Desk.
Get Product Codes from Printer
When you send an order to your printer, it will need to include their product code so they know what item to print on. Gather their product codes for the items you sell. Your sales rep at the print company will be able to help you get these codes.
These codes will be stored as the “print_sku” with your items in Order Desk. This is a different code from your own SKU for the item.
Prepare Artwork Files
Prepare your artwork files according to the requirements or templates each printer has. Your artwork files will need to be stored online and have to be publicly available so your printer can access them. If you don’t have a personal website for this, or if you prefer, you can use Dropbox or Amazon S3 for more advanced users. See this guide for instructions on how to get the public URL for Dropbox files.
These files will be stored as the “print_url” with your items in Order Desk.
If you have any items that require more than one print_url to be printed in different locations on the item (such as the front and back of a shirt), these will be added to your item as:
print_url_1 = www.dropbox.com/your-file-url-1
print_location_1 = front
print_url_2 = www.dropbox.com/your-file-url-2
print_location_2 = back
Contact your sales rep at the print company for the specific location names for items with more than one print location.
Place an Order Manually
We recommend placing at least one order with your printer manually to learn how Order Desk works.
Add or create order
If your shopping cart integrations are already connected, you may already have an order that needs to be sent to a printer. If you don’t have any orders in Order Desk yet, you can add an order manually following these steps.
Add print details to item in order
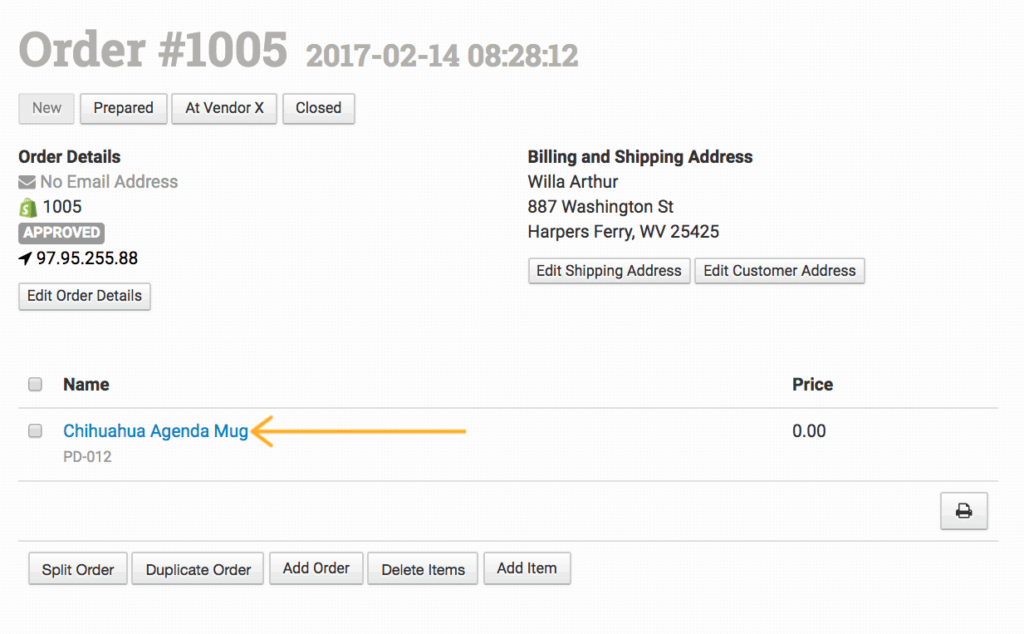
Once you have an order to work on in Order Desk, click on the item name in the order to add your print details (the print_sku and the print_url).
Click Add Variation twice so you can add two variations to the item.
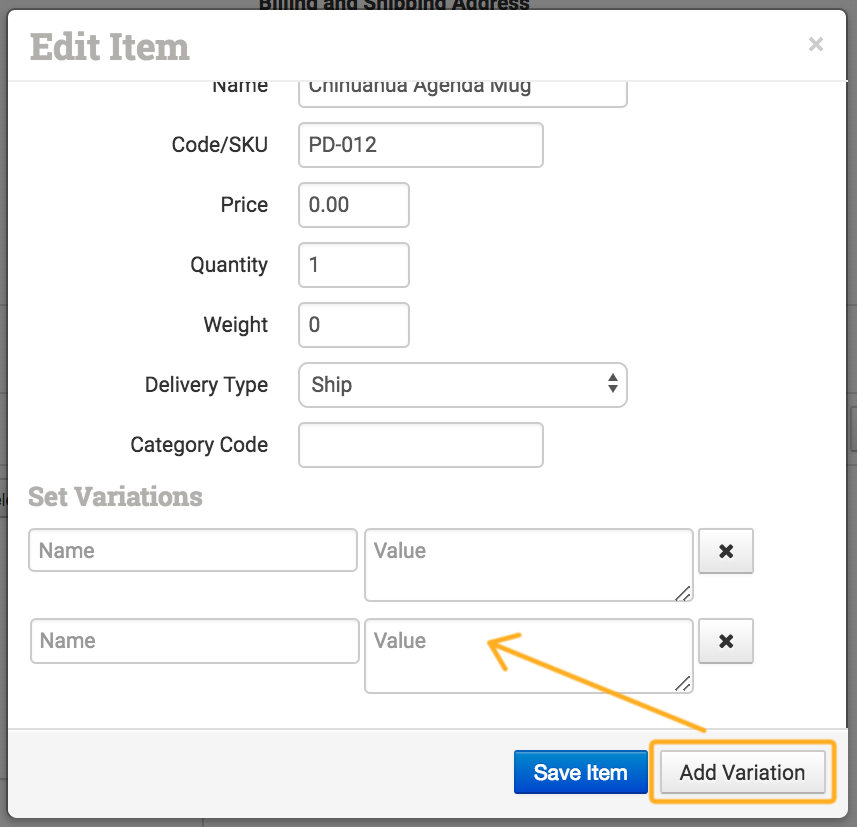
The two variations you will be adding are the print_sku and the print_url, using the printer’s product code for the item and the link to your artwork file as the values.
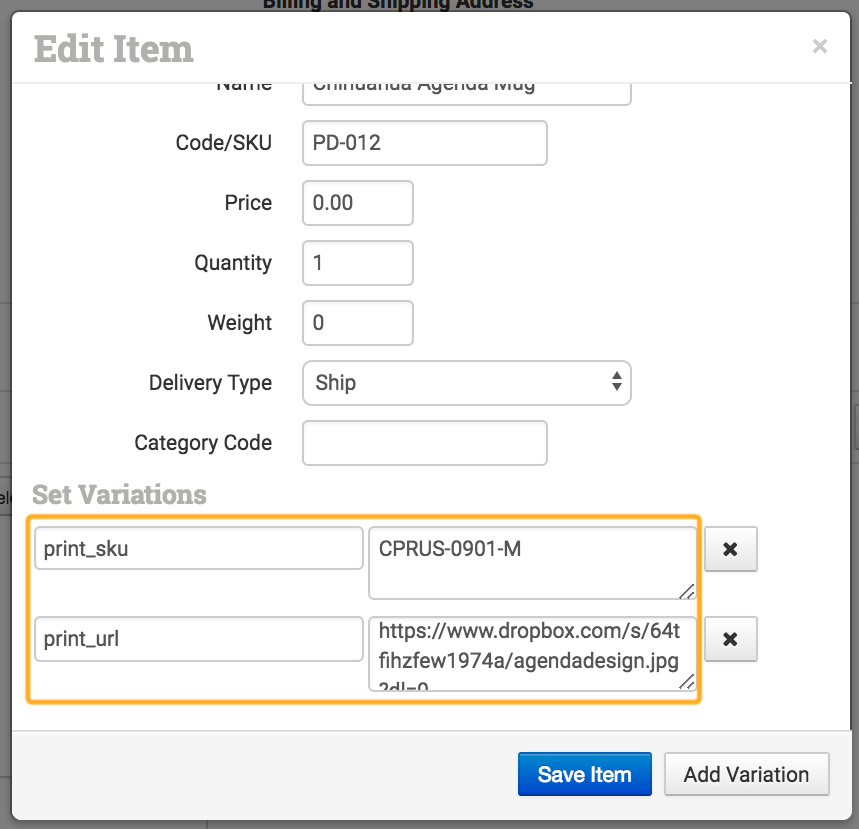
If you have more than one print_url for this item, add more variations to cover the locations and extra URLs following the guidelines in the Prepare Artwork Files section.
Click Save Item.
Send order to printer
You’ll see a button for every print on demand integration you have under the item in your order. Click the appropriate button to submit your order to that printer.
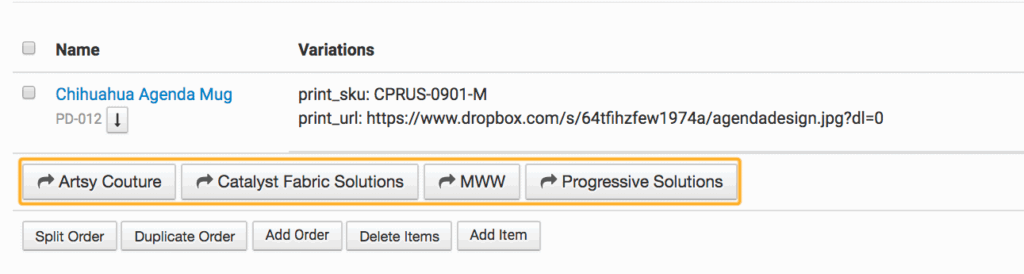
When you click this button, it queues up the order for export to the printer. It can take a couple seconds for the appointment to run, so give it a moment, then refresh the page to see if the order went through or not.
Did the order successfully submit?
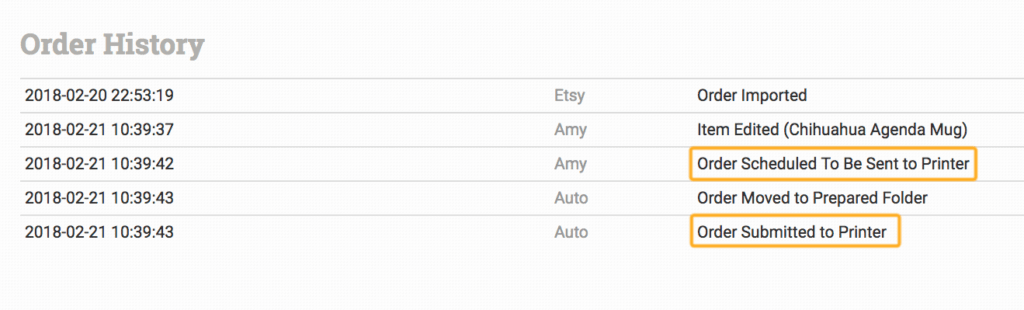
Scroll down to the Order History section near the bottom of the page. Order History shows all the events that happen to an order from the moment it is created. When you submit an order to an integration, an event is added to the history to say that the order was scheduled to be sent to the integration. If the submission was successful, an event is added a moment later to say it was submitted:
If the submission was not successful, an event will be added to say it wasn’t submitted with a message about why. In most print on demand orders, the error is that the print details are missing or wrong. If you get an error, double check that your variations are accurate, and contact Order Desk support if you still need help figuring out the error.
After an order is sent to a printer, we will check for shipment notifications and automatically add the tracking details to the order when we hear from the printer.
Add Inventory to Order Desk
Now that you have successfully submitted a manual order, the next step is to automate the process. To do this, you will need to set up Order Desk to add the print details to your orders automatically. This is done by storing your print details in your inventory items here in Order Desk. When an order comes into your store, the app will look at the SKUs on the items, find those same SKUs stored here and sync the print details into the order for each item.
Order Desk Inventory
There are several ways to add inventory to Order Desk. How you choose to do this is up to you and will likely depend on how many items you have. For more information on your options, refer to our getting started guide on adding inventory.
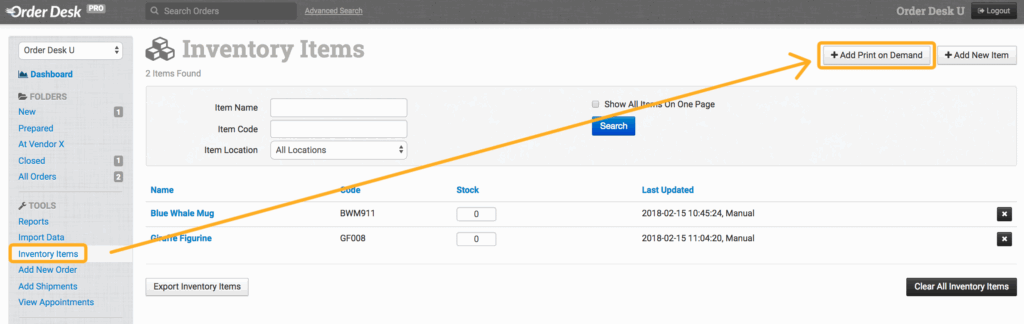
For print on demand stores, an additional option for adding one item at a time is to use the Add Print on Demand button in the top right corner of the inventory page.
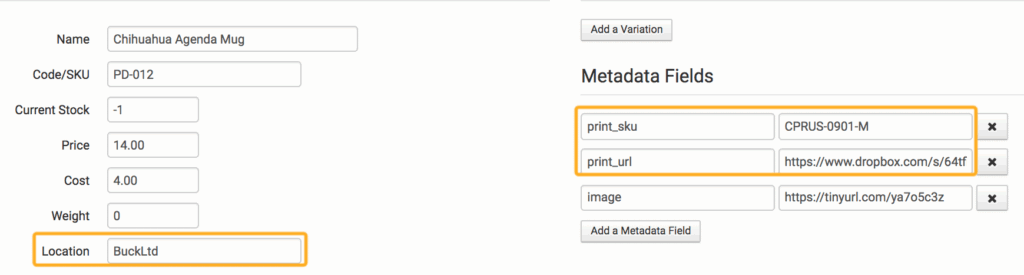
You can add your item information to each of the fields. The print_sku and print_url will be added to the metadata of the item. This will also add the printer name as the print location, which is necessary for splitting orders if you use more than one printer. We will cover splitting orders later in this guide.
If you prefer, you can use the Add New Item option instead, but make sure to add your print_sku and print_url as metadata to your items and set the printer’s name as the location:
If you have a lot of items, you can use a spreadsheet to import them all at once. Download a sample spreadsheet. Your spreadsheet needs to be saved as a CSV file and should have these columns:
Product Name, Your SKU, print_sku, print_url, Printer Name
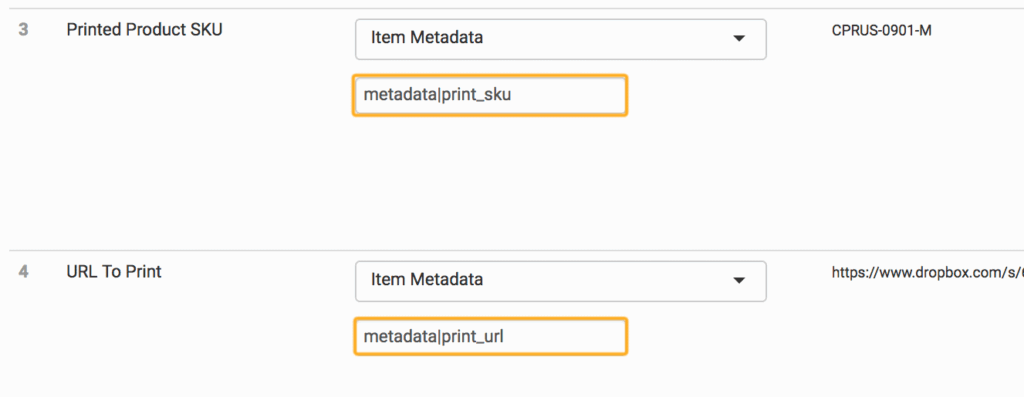
Follow these instructions to import your spreadsheet. When matching the columns in your import template, use metadata|print_sku and metadata|print_url for your print details.
Turn on automatic sync
Once your items are all added to Order Desk, you want them to automatically sync into your orders as they are added or downloaded. The inventory setting that does this is enabled on stores when a print on demand integration is added, but double check your store.
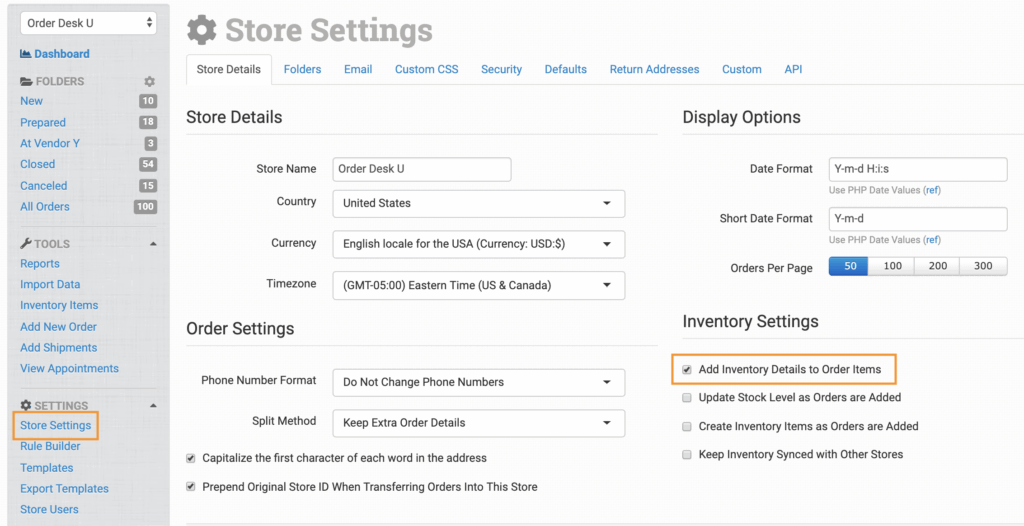
Click on Store Settings in the left sidebar. Under the Inventory Settings section, Add Inventory Details to Order Items should be checked.
When your inventory details sync into your order items, you’ll see the print details by clicking on the down arrow under each item.
If this setting was disabled or you updated an order or an item after the order had already been added to Order Desk, you can manually sync the print details into your order by scrolling to the bottom of the order page and clicking the Sync Item Details With Inventory button.
Automate the Process
Now that your print details are being added to your orders automatically, you can tell Order Desk to submit your orders to your printers. If you sell other kinds of products that don’t get sent for on-demand printing or if you work with more than one printer, the app can split your orders first.
Submitting orders to only one printer (no splitting needed)
If all of the items in your orders are meant for one printer, you can create a rule to automatically submit orders to that printer.
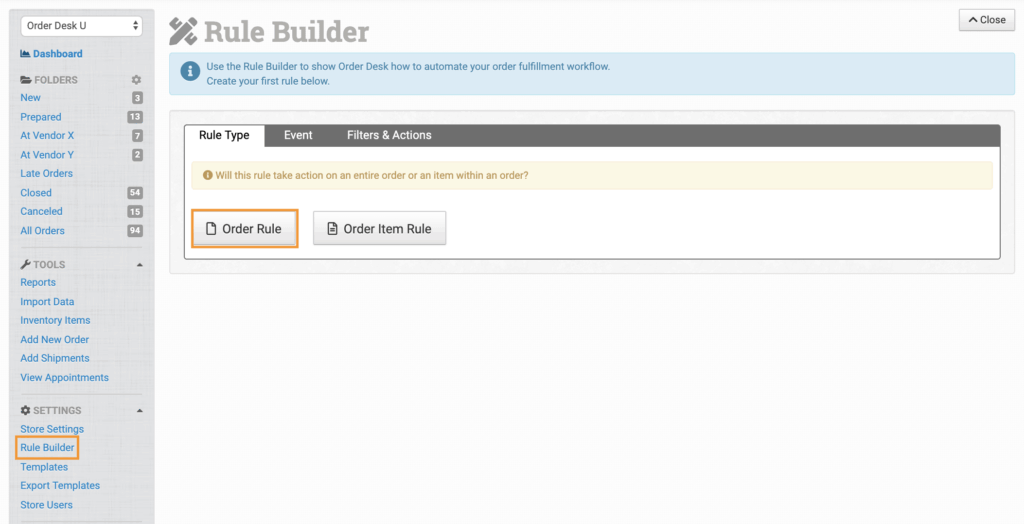
In the Rule Builder, select the Order Rule rule type:
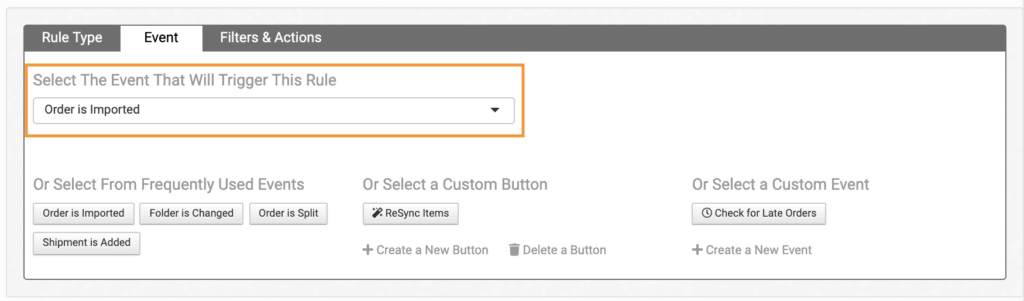
Select the event that needs to happen for the order to be submitted to the printer. This will most likely be Order is Imported but will be your preference:
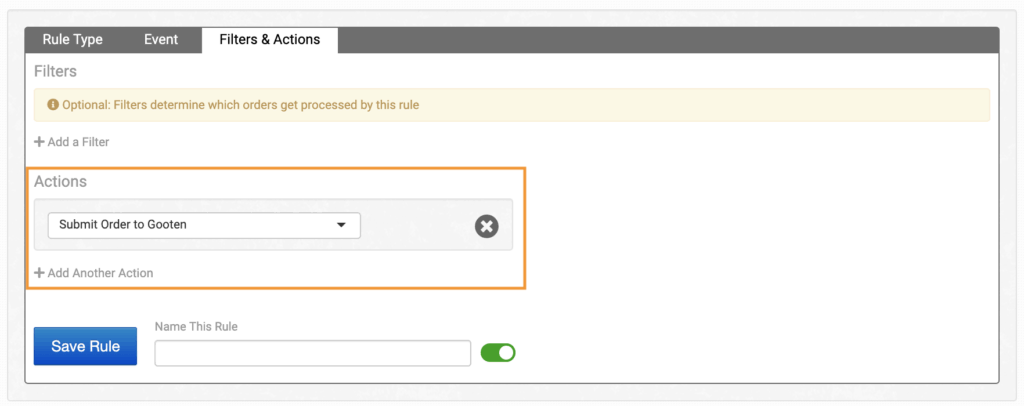
Under the Filters & Actions tab, select the Submit Order action for the print integration you use:
With this rule in place, every order you get will immediately be sent to your printer.
Submitting orders to multiple printers or vendors (splitting needed)
Shopify and BigCommerce have different instructions for splitting orders. See the linked guides for more information. All other integrations split using the instructions below. For detailed instructions on splitting orders, read the How to Split Orders guide.
Orders that need to be sent to different printers and/or vendors, will be split based on the location field in the item details.

To create your split rules, in the Rule Builder, select the Order Rule rule type and choose your event, such as Order is Imported.
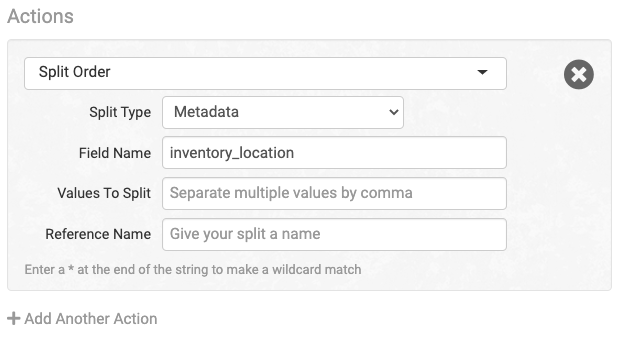
Under the Filters & Actions tabs, select the Split Order action. Choose Metadata as the Split Type, set the Field Name as inventory_location,
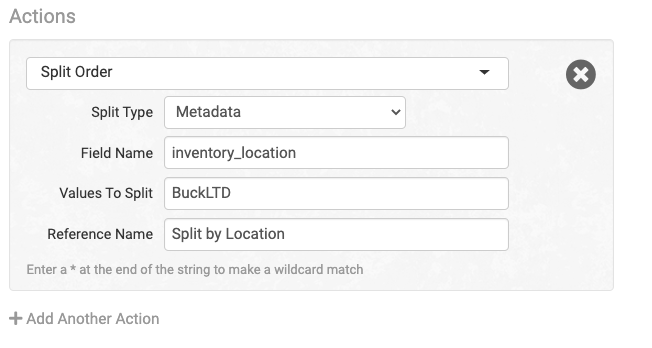
Create a separate split rule for each printer or vendor you want to split. The punctuation, capitalization and spaces of the location name have to be exactly the same in the rule as in the item.
If you have the inventory location set for all of your items and you want to automatically split all orders by that vendor name, you can simply create one rule that says:
Submit Split Orders to Printers/Vendors
Create another rule to submit the split orders to the appropriate printer or vendor. Choose the action for when Order is Split.
Click Add a Filter and use If Item Metadata inventory_location Contains XXX, where XXX is replaced with the printer name set in the location field:

For the action, select the print on demand integration where the order should be submitted. Set up a new rule for each printer you are using.
If any of your printers or other vendors are not integrated with Order Desk, you can set your rule action to email them or move them into a folder to be exported with a file. For more information on these other options, read our Split and Dropship Orders guide and our Building Export Templates guide.
FAQ
I’m getting errors when trying to submit orders to my printer. What do they mean?
Some errors say exactly what the problem is, such as “print details missing.” If the error makes sense, double check what it’s saying is wrong about the order and after fixing it, try to submit the order again.
Some errors don’t give enough information about the order to know what is wrong. For a list of common errors and what they mean, please see this guide. If you’re dealing with an error that you can’t figure out, contact Order Desk support.
How does syncing work and why is it necessary for Print on Demand orders?
You can learn more about how order syncing works and how to fix common problems with print on demand orders in this guide.