Working With Orders
Whether or not you have enabled any integrations, to get started with Order Desk, you’ll need some orders.
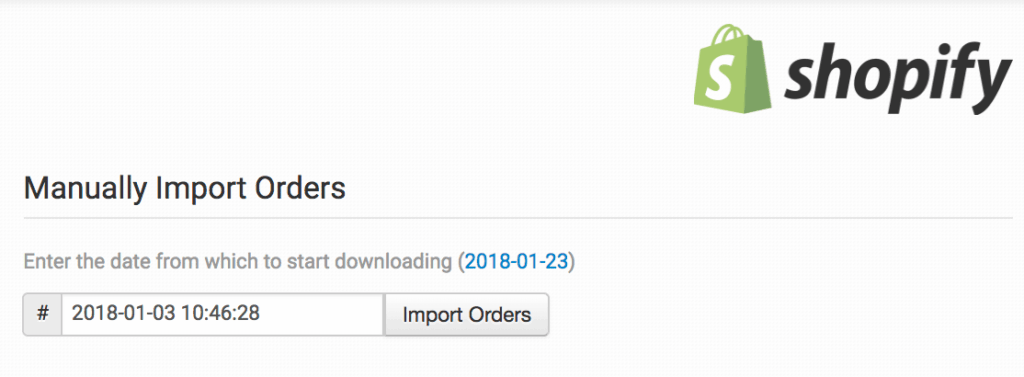
If you already have orders at one of the shopping carts we are integrated with, enable the integration to begin downloading orders. If you aren’t ready to start downloading orders automatically, you can manually pull in some orders with most integrations. Check your shopping cart integration settings to see if there is an Import Orders setting on the top right of the page:
If you don’t have orders or haven’t enabled any integrations yet, you can manually create real or test orders to begin exploring how Order Desk works. To manually create an order, click on Add New Order under the Tools menu in the left sidebar:
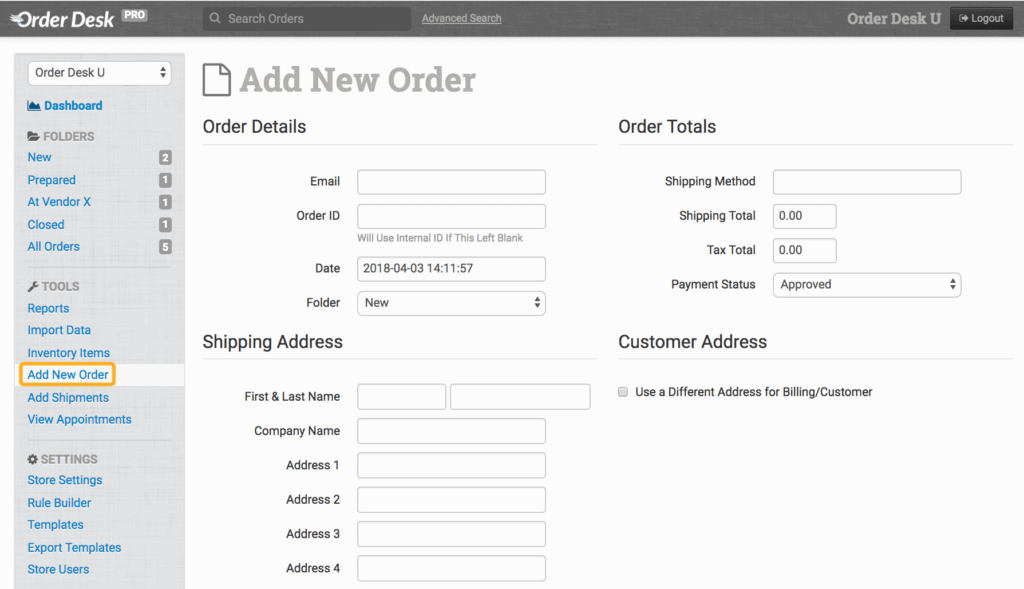
Fill out as many of the order details as you’d like. You can always edit or add information to an order later. You will need to add a Code/SKU for any item added as well as a shipping name or company name to create the order.
If you have a CSV file of some orders that you would like to add, you can import them after building an import template. This How to Import a Spreadsheet Guide goes over that process in detail.
Working With Inventory
Adding inventory items to Order Desk may be necessary if you have a print on demand store or need to split your orders for different fulfillment providers. It can also be beneficial for record keeping purposes.
There are a few ways to add inventory to Order Desk.
IMPORTANTEach product needs to have an individual, unique SKU. If two items share the same SKU, only the most recently added item will be stored in Order Desk.
Manually Add Items
You can manually add products by going to Inventory Items under the Tools menu in the left sidebar. To add an item, click on the Add New Item button in the top right corner.
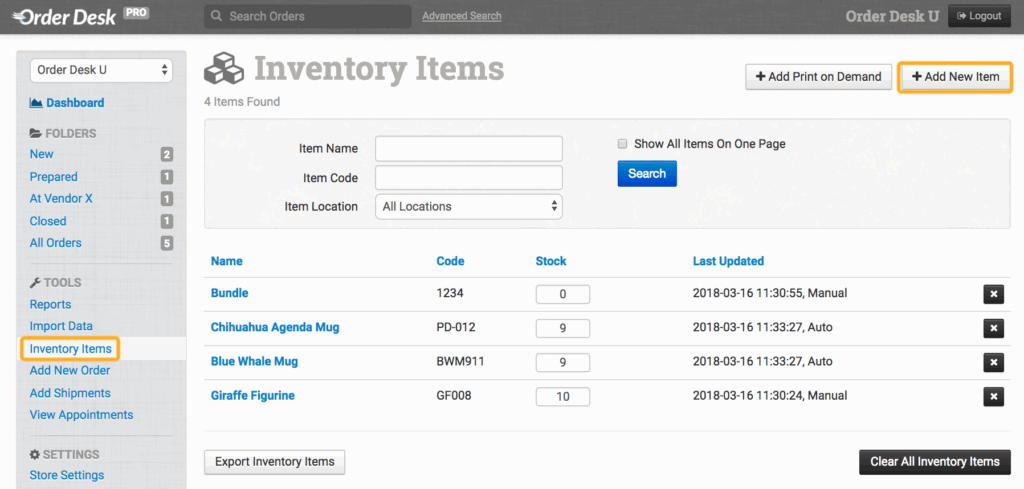
When adding your items, you must include a code/SKU.
You can also add print on demand items manually by clicking on the Add Print on Demand button. Print on demand products need extra information included, specifically a link to the print file and the printer’s product code. This option prompts you to fill in all the necessary details, but you can use the Add New Item option if you prefer. For more information on manually adding print details to your items, read through this section of the print on demand fulfillment guide.
Import File
If you need to import multiple products at once, you can use a spreadsheet. This will require creating an import template in Order Desk so you can match the field names from your file to the field names used in Order Desk.
For detailed instructions on how to import your inventory from a file, read the How to Import a Spreadsheet guide.
Import with Orders
Products can also be imported with your orders. When an order is added to Order Desk, if any items in the order are not yet stored here, they can be automatically added to the inventory.
To set up your Order Desk store to do this, go into your store settings page and look under the Inventory Settings section. Enable the Update Stock Level as Orders are Added and Create Inventory Items as Orders are Added settings:
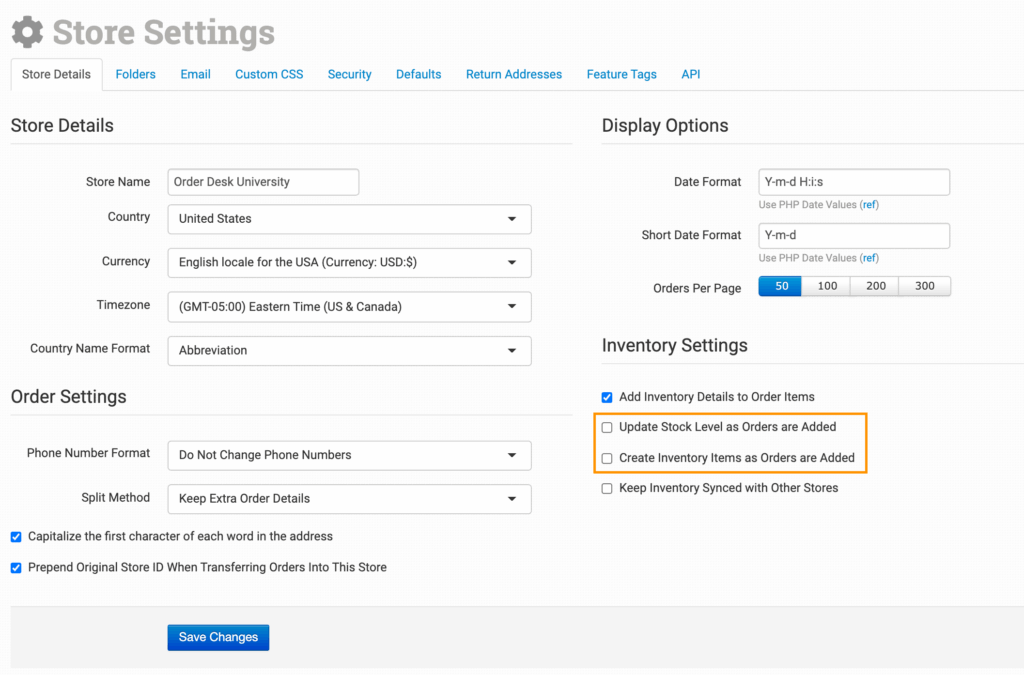
Both settings need to be enabled for this to work. When you import, download or create a new order, any product in the order will automatically be added to your inventory in Order Desk if it doesn’t already exist.
Import from Integration
Items can be added from integrations. Not all integrations have this feature, so check the settings page of any integrations you have enabled for an inventory import button like this:
If the integration you use supports this, you can manually import your inventory items by clicking this button.
IMPORTANTIntegrations have limitations on what can be imported. For instance, Amazon MCF only sends the SKU and quantity, so your products will all be called “No Name”. We can only bring in the information supplied by the integrated service, so you may see differences from integration to integration.
Export Inventory Per Page
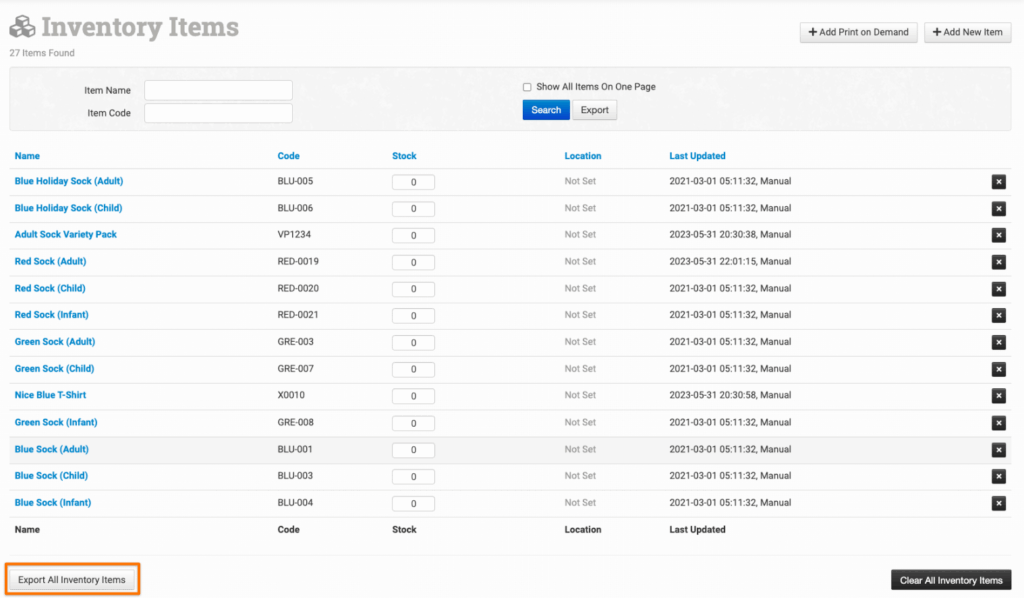
Items can be exported by page using the Export All Inventory Items at the bottom of each page in your Inventory Items.
Export Specific Inventory

Specific inventory items can be exported using the search function in your Inventory Items page. By adding search terms to the fields and clicking Export, only items in your inventory that meet the criteria will be exported.
For a more thorough overview of the Inventory Items page and working with your inventory once it has already been added to Order Desk, please refer to the How to Work with Inventory Details guide.
Send Orders
To an Integration
You can set up rules (which we’ll discuss in the last getting started guide) or adjust the settings in certain integrations to automatically submit orders. We recommend that you submit orders manually for the first few days until you have a better understanding of how the fulfillment process works in Order Desk. This also gives you the opportunity to correct any mistakes as you catch them, something that is harder to do when everything is running automatically.
After you are familiar with the flow of orders through Order Desk, have corrected any mistakes that cause errors, and you can trust that your integrations are set up properly by watching your orders pass through the app for a few days, it would be a good time to begin automating the process for your store. Before doing that, let’s look at how to submit orders manually.
To submit an order manually to an integration, open up the order and look under the order details for a little button with the name of the fulfillment service you are sending it to. Click the button to submit the order to that service. For this order, we want to send it to ShipStation, so we’ll click the submit to ShipStation button:

It’s that easy!
However, there may be issues when you first submit an order. When you click to submit, the order queues up to go through to your fulfillment service. If you check back (or refresh the page) after a few seconds, scroll down and look at the order history section at the bottom of the page to see if the order submitted or not.

In most cases orders submit without any issues, but occasionally an order is rejected because something is wrong in the order per the fulfillment service’s requirements for submission. When this happens, an error message is passed through to Order Desk from the fulfillment service that gives the reason the order was rejected:

Some common errors include the address format being wrong, the SKU missing or being incorrect, the shipping country being unavailable for that fulfillment service, the shipping method not matching what the fulfillment service is expecting or the print file missing for print on demand items.
Based on the error message, fix the problem with the order and re-submit it. If the error message doesn’t make sense, you can reach out to Order Desk Support or to your fulfillment service for more help. In some cases, we may ask you to contact them, as we aren’t familiar with every error message we see from different services, but we’ll be happy to take a look at your order to help you figure out the problem.
To a Third Party Vendor
If you need to submit orders to a third party service that isn’t currently integrated with Order Desk, you can do this too. Typically the way Order Desk customers submit orders to third parties is to send them a dropship email with the order details. For more information on how to set up these emails, please review this guide on creating dropship email templates.
It isn’t necessary to create a rule yet to automate the process. If the email template has already been created, you can submit an order from the order details page by clicking on the email button and selecting the email template meant for your fulfillment service:
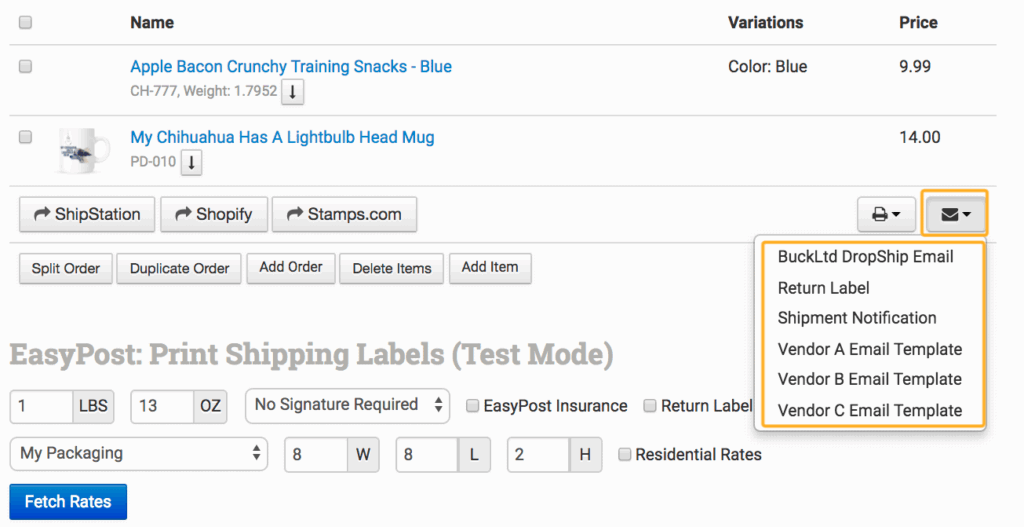
Another way to submit an order to a third party vendor is to export a CSV file. This is a more advanced option, requiring an export template to be created and sent through email or FTP. For more information on how to do this, please review this guide on How to Building Export Templates. If you need any help with this, please contact Order Desk Support.
Next: How Customizable Is Order Desk Really?