EasyPost allows you to create shipping labels for a low cost. Use the EasyPost integration to create and print labels directly from your orders in Order Desk. EasyPost supports a wide variety of carriers. To see their full list visit their site.
This guide will go over how to enable and set up the EasyPost integration within Order Desk. For instructions on how to use EasyPost with Order Desk, see the Creating Labels with EasyPost guide.
Setup
If you haven’t already, you will first need to create your own EasyPost account.
Add Carriers in EasyPost
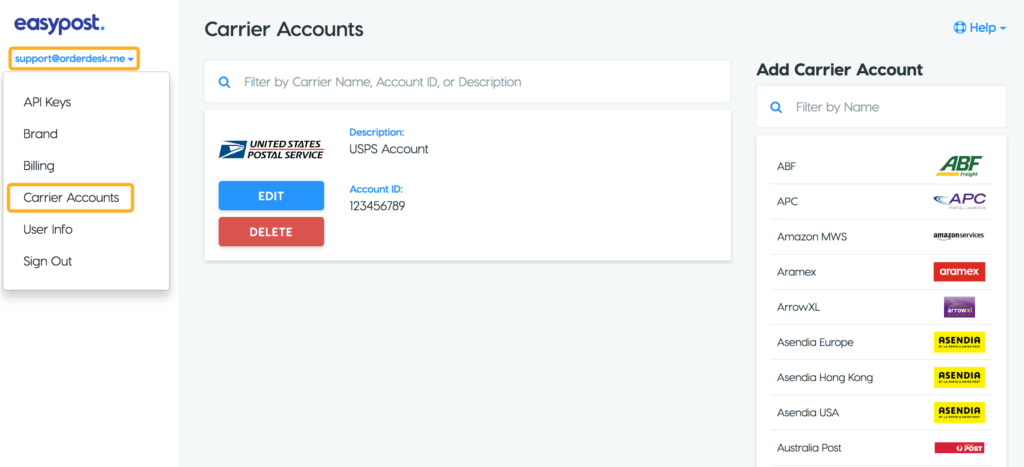
In your EasyPost account, select all of the carriers that you use. Any carrier you add to your account in EasyPost will be available in Order Desk.
To add your carriers in EasyPost, click on your email address in the upper left corner. Select Carrier Accounts from the dropdown.
Get API Keys from EasyPost
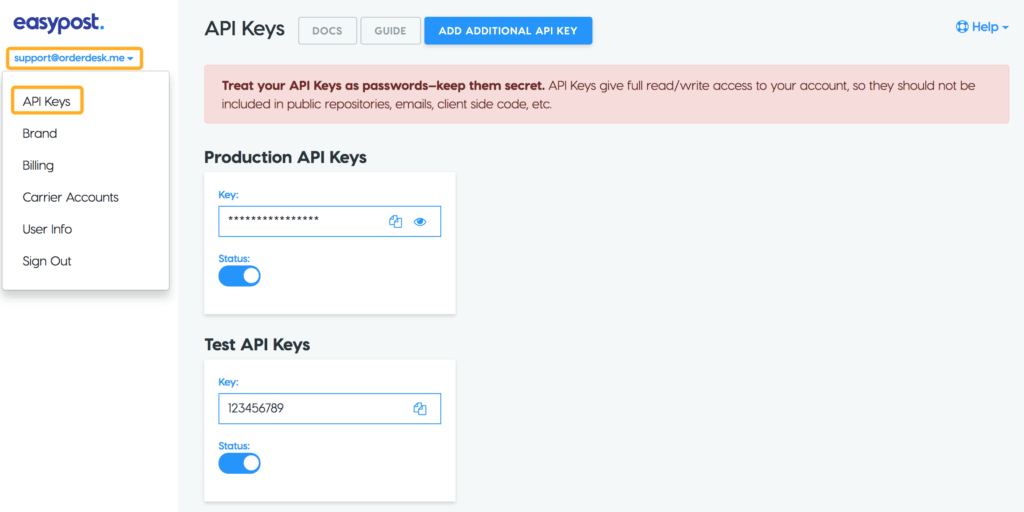
Get your API Keys from EasyPost. These will need to be added to the integration in Order Desk.
To find them, click on your email address in the upper left corner. Select API Keys from the dropdown.
Connect EasyPost Integration in Order Desk
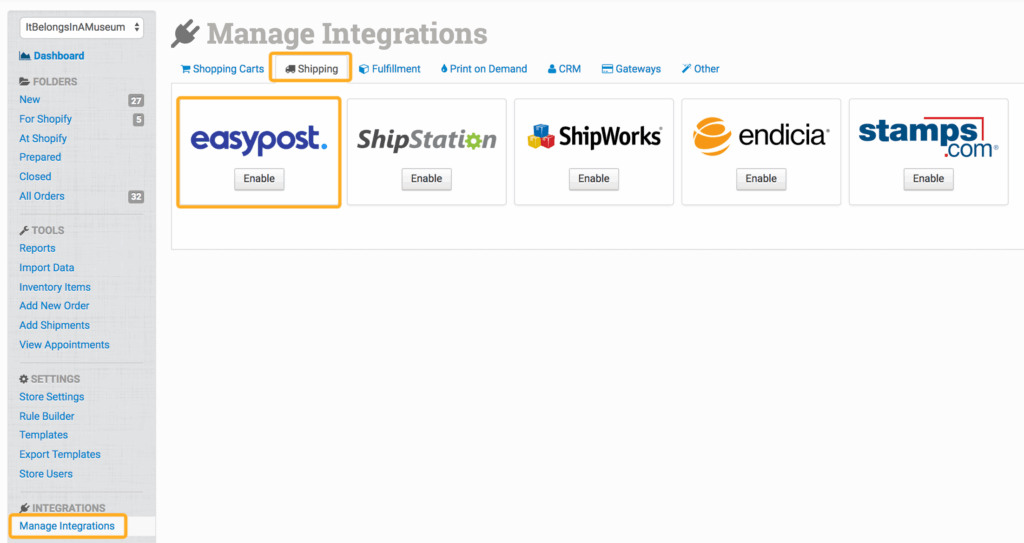
In Order Desk, click on Manage Integrations in the left sidebar. Under the Shipping tab enable the EasyPost Integration.
Paste your Test API Key and Production API Key in the EasyPost integration to enable the connection.
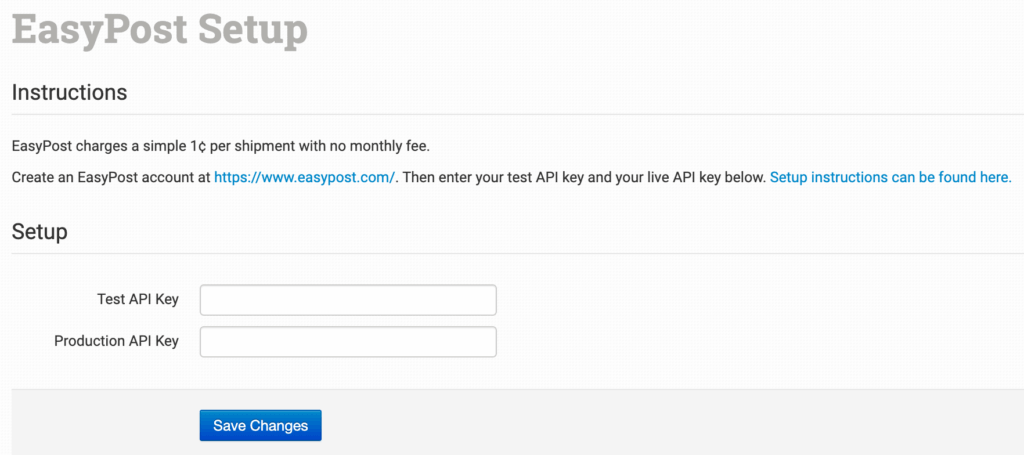
Please note that Order Desk isn’t able to help find or reset your credentials, as they can only be provided by EasyPost.
Integration Settings
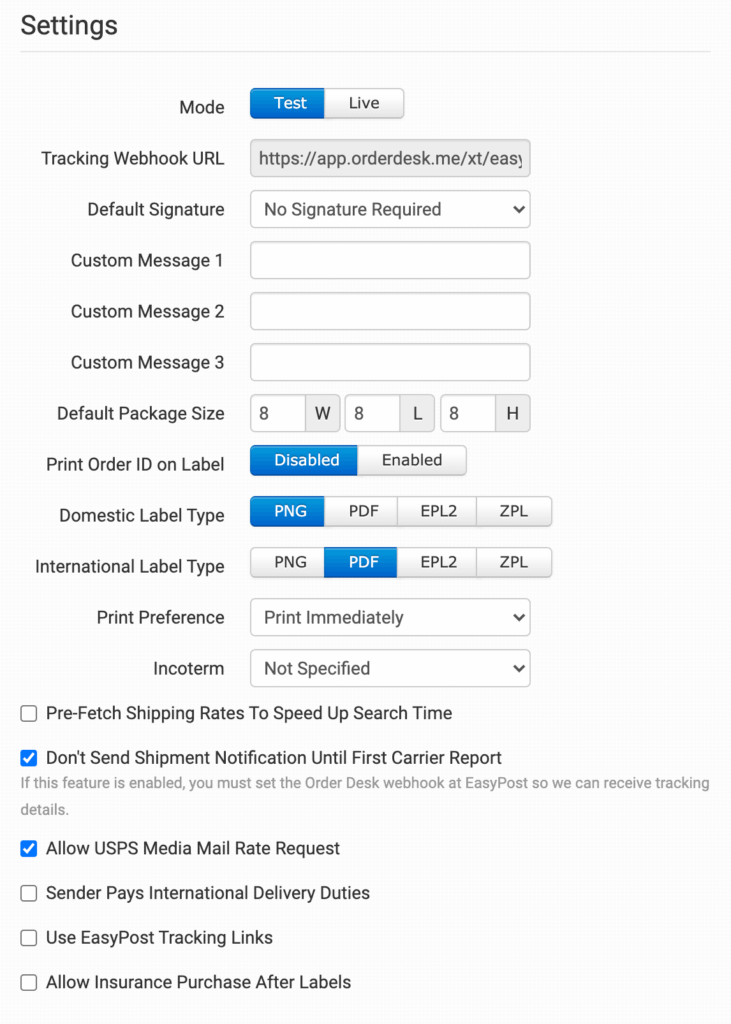
Mode
The integration can be in Test mode or Live mode. Test mode allows you to create voided labels and get familiar with the platform. When in Test mode, prices will not reflect EasyPost discounts and EasyPost will not charge for any labels created in Test mode. To see the actual shipping prices, the integration must be set to Live mode and be working with real labels.
Tracking Webhook URL
This custom URL is assigned to your account when the integration is enabled and is used by EasyPost to send tracking status and shipping updates to Order Desk. Enter this URL at EasyPost if you require this functionality. Webhooks can be added from the Webhooks & Events page in EasyPost:
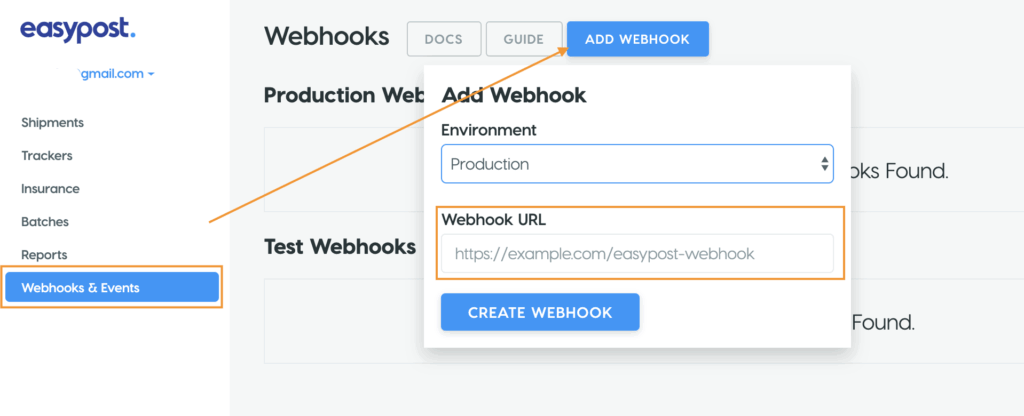
For more details about how this webhook URL works, scroll down to the Don’t Send Shipment Notification Until First Carrier Report section.
Default Signature
Choose the default signature type for your packages from the options:
- No Signature Required
- Adult Signature Required
- Signature Required
- Default Delivery Confirmation
Custom Messages
Custom Messages are optional messages you can print on the label. The location of the custom message on a label will vary depending on the carrier. Twig is accepted in these fields.
UPS labels only support up to two Custom Messages.
Default Package Size
Choose your most common or default package size. These dimensions will be displayed in the EasyPost label creator on each order page. They can be changed from order to order if necessary from within the order page.
Print Order ID on Label
The order number will be added to the label if enabled.
Domestic and International Label Type
Choose the label format for domestic and international labels. Choices are PNG (an image file), PDF (a portable document format) or EPL2 or ZPL (for label printers). Any orders needing customs forms are best printed in PDF format.
Print Preference
Choose whether you want labels to Print Immediately or Not Print Automatically.
This is primarily used if you would like to be able to create labels but not print them right away.
Incoterm
Select DDP for the sender (you) to pay international delivery duties.
Select a different incoterm value to pass international delivery duties to the recipient. For more information, please reference EasyPost’s support article on the topic or contact EasyPost or your carrier for more details about each incoterm value.
Incoterm can also be set on an order-by-order basis using the metadata field incoterm with the applicable incoterm value.
Pre-Fetch Shipping Rates to Speed Up Search Time
If selected, prices will be displayed automatically based on default settings. Settings can be adjusted and rates fetched again, if necessary.
Don’t Send Shipment Notification Until First Carrier Report
If this setting is disabled, an order will be considered shipped as soon as the label is created by EasyPost.
When enabled, this setting waits to mark a package as shipped until the first carrier report “in_transit” is returned from the tracking webhook URL. This allows for time between when a label is printed and when a package is actually shipped.
If enabled, you can also use the Process Manual Shipments action in a rule. For this to work, ensure you have not set the tracking webhook URL in your EasyPost account, as that will override any rules you set up in Order Desk to process the shipments manually.
The tracking will still be added to the order as the label is created, but instead of the shipment added event running immediately, set up a rule using the Process Manual Shipments action to have the shipment added event run when your rule runs instead.
For example, you can set up a custom button to process the shipments manually when you click the button, rather than when the label is first created or the first carrier report comes back. For more information, read the How to Use Custom Buttons guide.
For more information on working with rules, please read the Order Desk Rule Builder guide.
Allow USPS Media Mail Rate Request
If you ship media mail packages through USPS, select this setting to have media mail rates returned when searching prices from EasyPost.
If left unchecked, media mail prices won’t be returned in the search.
Sender Pays International Delivery Duties
If selected, the sender (you) will pay international delivery duties on shipments.
Use EasyPost Tracking Links
If selected, the tracking link added to the shipment information will be the branded EasyPost page rather than the carrier’s tracking page.
Allow Insurance Purchase After Labels
If selected, you can buy insurance separately from the label purchase.
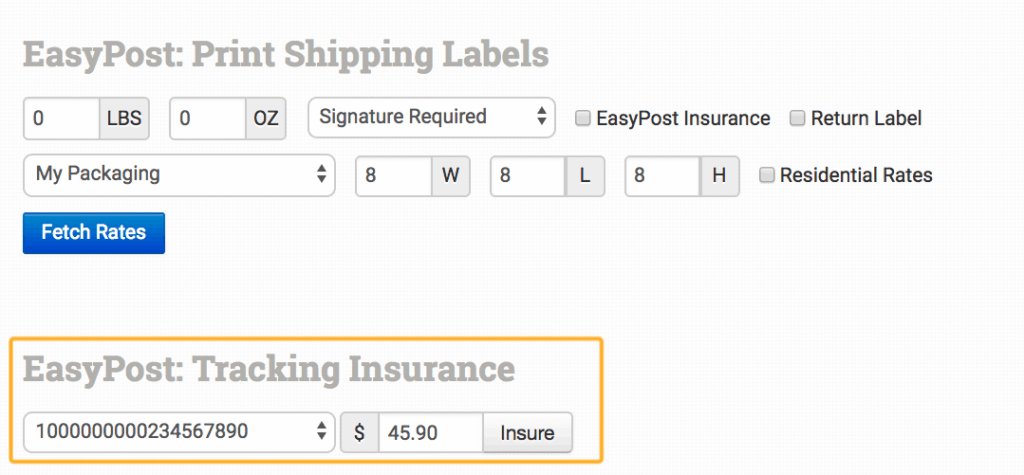
To purchase insurance after a label has been created, the tracking numbers for an order will appear under the EasyPost label creator. Select the tracking number you want to buy insurance for and follow the prompts.
Customs Details

Fill out the necessary Customs Details for international packages. This includes:
- The Customs Signer Name, which is the name of someone from your store who is responsible for the accuracy of the information on the customs form. Set the name of the person in your organization who is responsible for this.
- The Customs Contents of the package to declare the type of product(s) being shipped overseas (Merchandise, Documents, Gift, Returned Goods or Sample).
- The Non Delivery Option, which determines what action is taken if the package is undeliverable (Return or Abandon).
- The Default HS Tariff Number, a six digit code specifying the type of product being shipped and is required on customs forms when making international shipments. If you aren’t sure what code to use for your store, please see EasyPost’s guide or refer directly to the Harmonized Tariff website.
- The Importer Tax Number, which allows setting your Importer Tax Code to be sent to EasyPost in the shipment options to be passed to the carriers that support VAT or IOSS information at EasyPost. This Importer Tax Number will be used if the order doesn’t have the
tax_idorIOSS. If this field is left blank, then the the default IOSS number from the Store Settings will be used instead. Please note that not all carriers currently support IOSS information. Here’s EasyPost’s IOSS Carrier Update page, where you can find a list of all the carriers that are currently supporting IOSS information to be relayed. - The License Number is for senders who are registered for EU Economic Operators Registration and Identification number (EORI). If you have an EORI number registered, you must set the EORI number in this field, which will be sent to EasyPost in the shipment options to be relayed to the carriers.
See EasyPost’s guide about Customs Information here.
Shipping Class Match

Use the Shipping Class Match feature to map the names of any shipping methods you use in your shopping carts to the shipping method names EasyPost uses.
When you have a Shipping Class Match set up for EasyPost, you’ll see it available as an option when you’re creating your shipping label.

For more information on how to set up shipping class matches, please read through the Shipping Class Match guide.
Default Shipper Information: Setting a Return and From Address
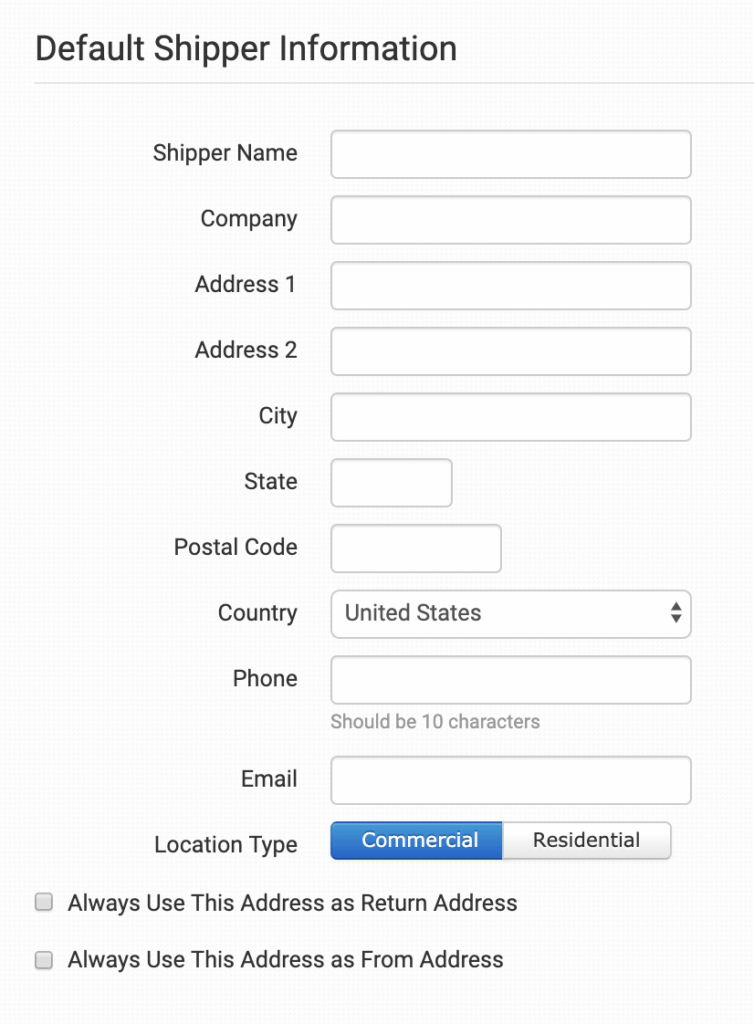
Default Return Address
Set your default return address in the Default Shipper Information.
This will be used for all orders unless otherwise specified.
Always Use This Address as Return Address or as From Address
Select only one of these options if you need this address to always be used as either the Return Address or the From Address.
Return Address is different from the Default Return Address
To set a return address on an order by order basis, disable the Always Use This Address as Return Address setting.
To set the return address for each order, click on Set Return Address in the the order. Choose an available address or add a new one for the order.
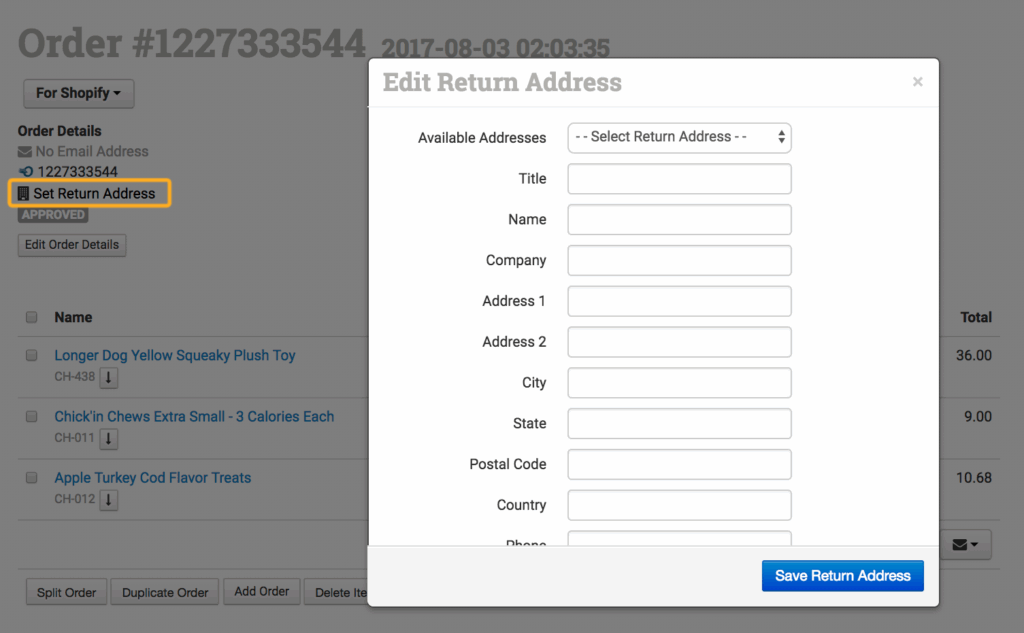
Available addresses can be stored in your Store Settings. For more information on how to set these up, see the Store Settings guide.
Use rules to automatically select available return addresses for specific orders.
From Address is different from the Default Return Address
If the Always Use This Address as Return Address setting is enabled, the From Address, when different from the default Return Address, can be edited directly from the order page for specific orders.
To add the From Address without changing the Return Address, go to the order page and click on Set Return Address in the Order Details section.
Add the From Address as the Return Address here. The Return address will still be the address set in the EasyPost settings while this new address will act as the From Address.
Location Type
Choose the Location Type for the return address, either Commercial or Residential.
Custom Return Address Override
If you would like to customize one or more fields within a pre-set return address, you can set any of the following field names as order metadata:
return_name
return_company
return_street1
return_street2
return_city
return_state
return_zip
return_country
return_phone
return_email
Where any of these order metadata fields exist on an order, they will be used to overwrite the same field in the return address for that order.
Validating Addresses with EasyPost
When EasyPost is enabled on a store, the shipping address will have a validation option:
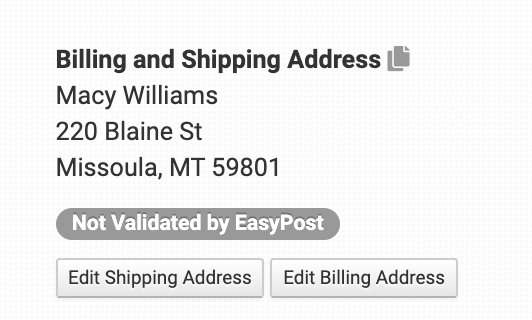
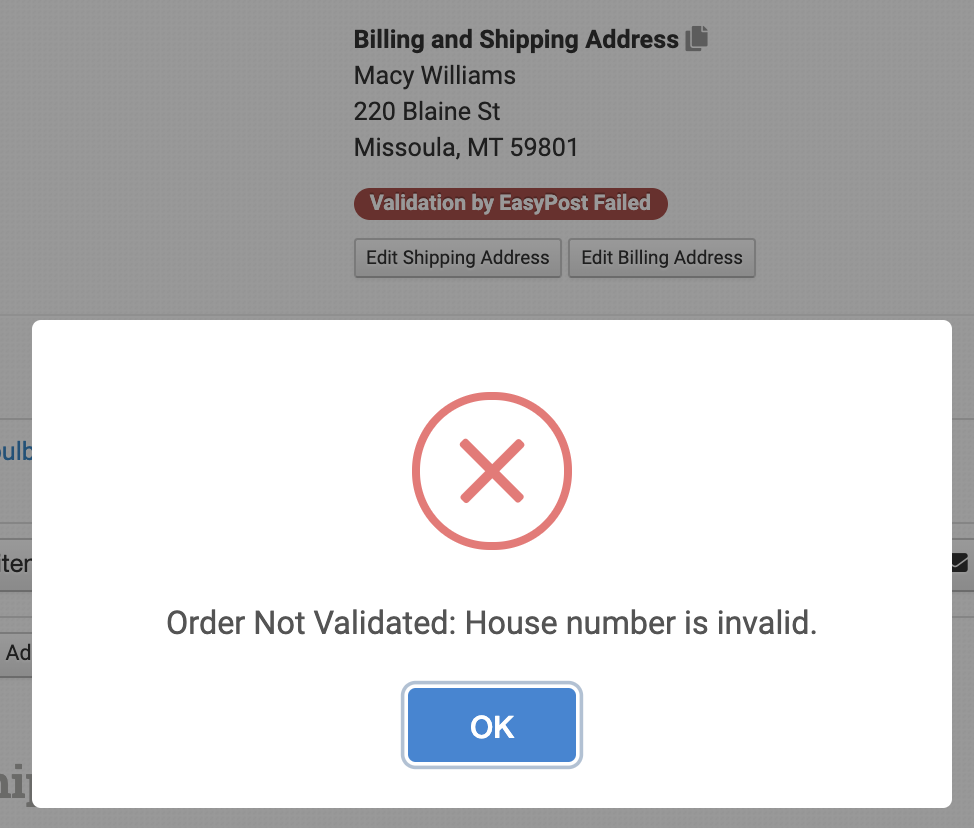
Click the gray Not Validated by EasyPost icon and EasyPost will check the address and provide information if it isn’t valid:
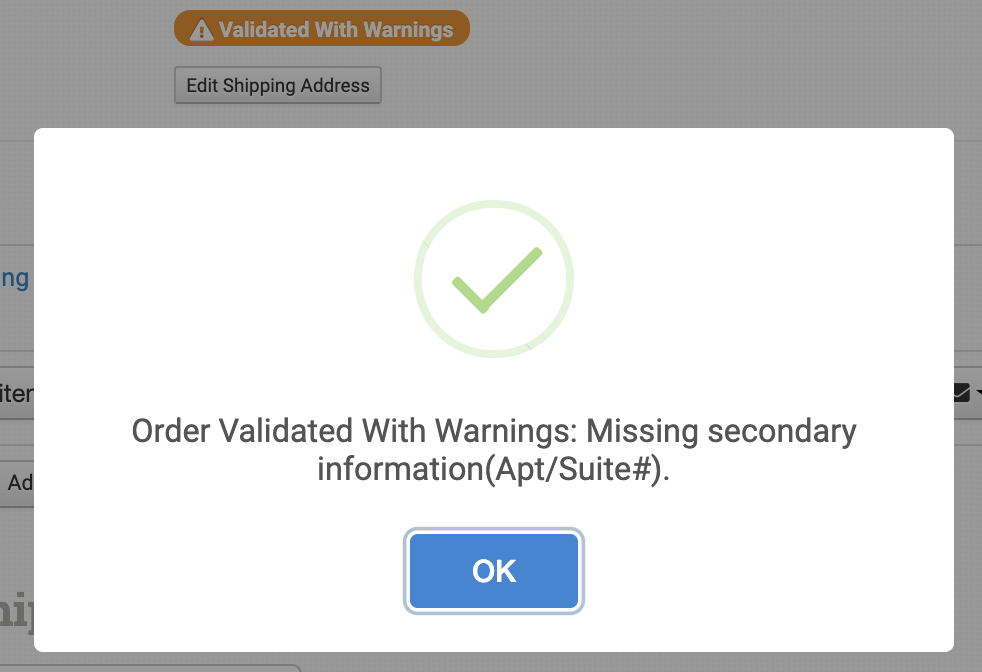
or if it is missing an important detail:
Automating Address Validation
You can use rules to automate the address validation step on orders and tell Order Desk what you want to happen to the order depending on the results.
In the Rule Builder, set up a rule with the event and filters of your choice, then choose the action Validate Order Address at EasyPost:

To take action on orders once the address is checked, set up additional rules using the EasyPost Validation events:
- Address Validated with EasyPost
- Address Validation Failed with EasyPost
- Address Validated with Warnings with EasyPost.
Select the actions you want to happen when one of these events happens. If the results of the validation do not appear to be accurate, please contact EasyPost for help.
For more information on your options with the Rule Builder, see the How to Work with Rules guide.
Working with Taxes, Tariffs, and Customs
When your IOSS number is added in your store’s custom details or included in the order metadata, we will automatically pass it along in the correct field for your international orders.
If you would like to include custom sender tax details, you will need to use them with the following fields:
- SenderTaxId
- SenderTaxIdType
- SenderTaxIdIssuingCountry (Optional)
Since SenderTaxIdIssuingCountry is optional, if you don’t fill this field out then we will use the information added as the return address country.
For custom receiver tax details, use the following fields:
- ReceiverTaxId
- ReceiverTaxIdType
- ReceiverTaxIdIssuingCountry(Optional)
If no ReceiverTaxIdIssuingCountry field is added, the issue country for the receiver will be used instead.
For more information on the different types of taxes and selecting the right one, please refer to the Tax Identifier guide from EasyPost.
If you would like to include include a customs declaration message you can use the following field as order metadata or checkout data:
- customs_declaration
Please note that this field only applies to eligible carriers, as specified by EasyPost.
Item Details
The following fields can be set as variations or item metadata for each item in an order.
| Field Name | Field Description |
| hs_tarrif | Use to pass tariff data on an item by item basis. The value should be a harmonized code. |
| easypost_description | Use to pass item descriptions. If left blank the item name will be sent. |
Orders Details
The following fields can be set as checkout data or order metadata:
| Field Name | Field Description |
| easypost_payment_type | Use to set a payment type. Options are: COLLECT, SENDER, THIRD_PARTY, and RECEIVER. If no value is set, SENDER will be the default. |
| customs_contents_type | Use to override the customs settings in your integration settings. Options are: merchandise, returned_goods, documents, gift, sample, and other. |
| freight_charge | Use to pass additional cost to be added to the invoice of this shipment. Only applies to UPS shipments. |
| saturday_delivery | Use with a value of 1 to request that EasyPost make the order eligible for Saturday delivery. |
| invoice_signature_required | Use with a value of 1 to require signature image on shipment. If using this field, an image needs to be added to your EasyPost account in advance. |
| invoice_letterhead_required | Use with a value of 1 to require a letterhead image on shipment. If using this field, an image needs to be added to your EasyPost account in advance. |