Order Desk can import orders from your shopping cart(s) and send them to Cubyn for fulfillment.
Setup
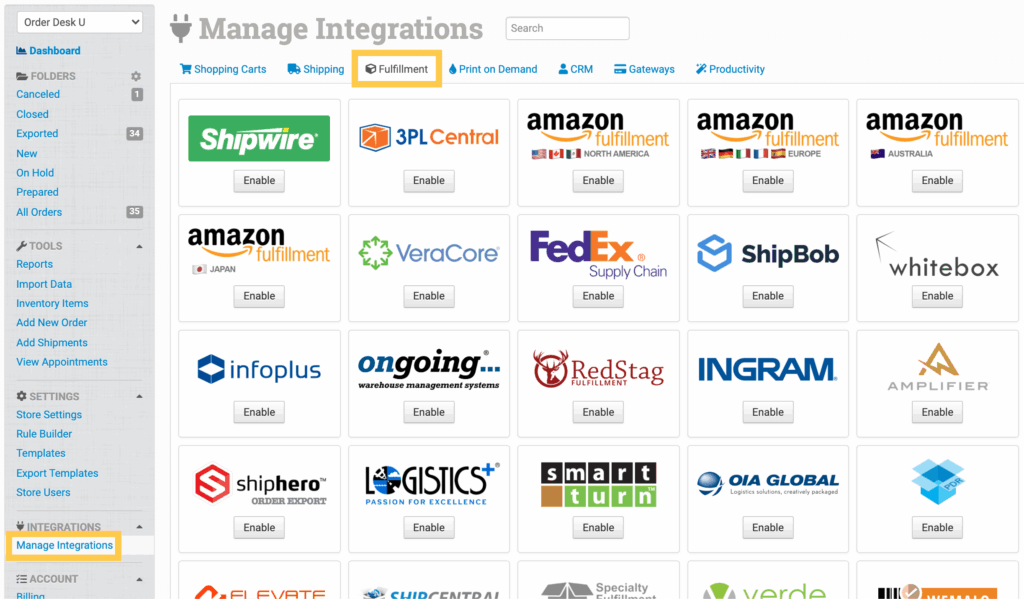
To connect to Cubyn, click on the Manage Integrations link in the left sidebar and under the Fulfillment tab find and enable the Cubyn integration.

Alternatively, search for Cubyn integration from the available integration search.

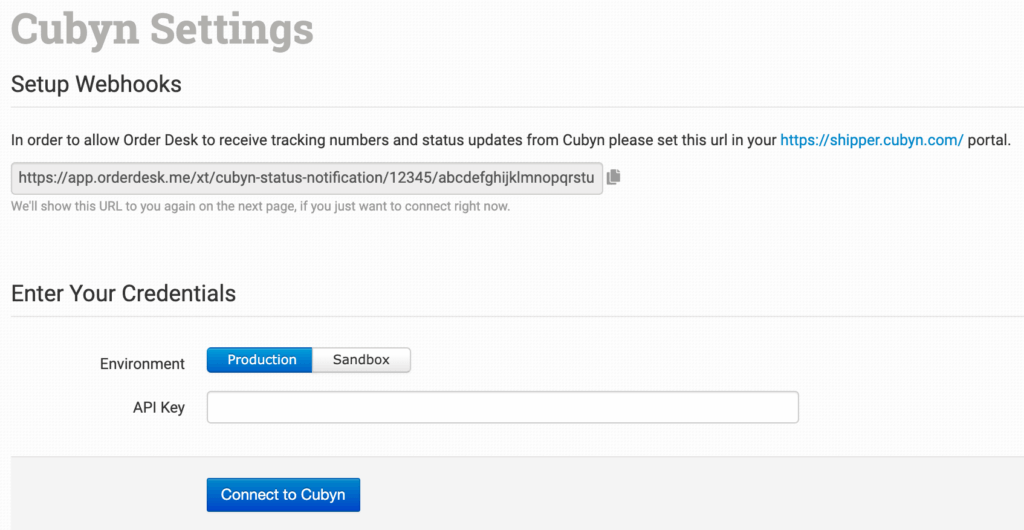
To enable Cubyn integration, copy and paste your custom generated URL into your Cubyn portal, set your Environment to Production (live) or Sandbox (test), and grab your API Key from Cubyn to make the connection. If you want to skip the webhook step for now, you can add it after the initial connection has been made.

Please note that Order Desk isn’t able to help find or reset your credentials, as they can only be provided by Cubyn.
Integration Settings

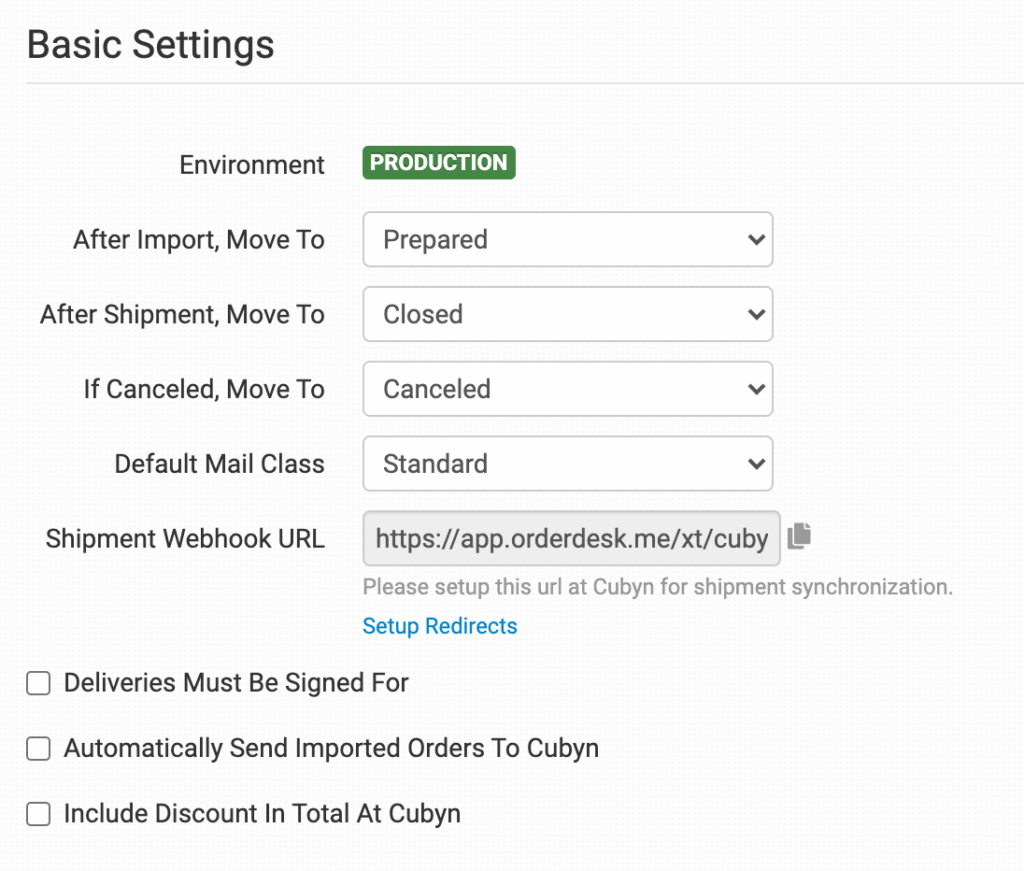
Environment
This will reflect the environment selected during setup. If you need to switch environments, you can do so by clicking the Disconnect button at the bottom of the page and then connecting to the integration again in the other environment.
After Import, Move To
Select the folder you want orders to be moved into after they are successfully sent to Cubyn.
You can use one of the default folders already in your store or create your own. Read the Working with Folders guide for more information.
After Shipment, Move To
Select the folder you want orders to be moved into as Cubyn sends shipment details back to Order Desk.
If Canceled, Move To
Select the folder you want orders to be moved into when an order is canceled in Cubyn.
Default Mail Class
Choose the shipping class you want Cubyn to use for your orders. If Relay is selected, RelayPickupRef must be set on each order. Details below.
If you need to apply specific methods for certain orders, match your method names to the names Cubyn uses in the Shipping Class Match section below.
Shipment Webhook URL
If you skipped this step when connecting the integration, add this webhook URL to your Cubyn account. This is necessary for Cubyn to be able to send shipment notifications back into your orders in Order Desk.
Setup Redirects

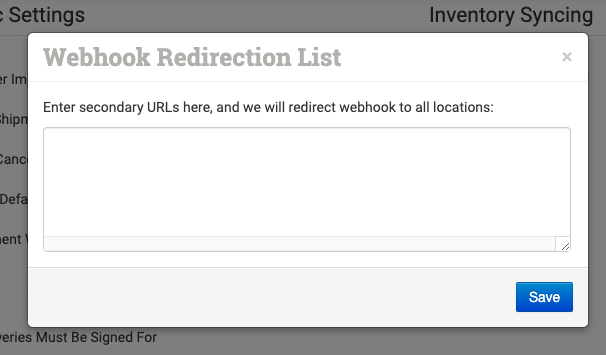
If you connect the same Cubyn account to more than one Order Desk store, you will need to setup some redirects so when the shipment info comes back from Cubyn, it will find its way to the right Order Desk store.
In your primary store, where the first connection to Cubyn was made, you will see Setup Redirects. Click this link to open your Webhook Redirection List. Then, in your other Order Desk stores that are also connected to the same Cubyn account, find the Notification URL.
Copy this URL and paste it into the Setup Redirects field in your main store. Add one URL per line, making sure all notification URLs from your other Order Desk stores are included.
Deliveries Must Be Signed For
Check this to require a signature for all deliveries. This can be changed on a per-order basis. Details below.
Automatically Send Imported Orders To Cubyn
If you want to send all orders to Cubyn, select this option.
If you would prefer to only send certain orders to Cubyn, keep this option disabled. Instead, use the Rule Builder to tell Order Desk which orders to send.
Include Discount In Total At Cubyn
Orders are sent to Cubyn with the product total being set in their “value” field. If you offer discounts and would like the total paid, or the processor balance, sent to Cubyn instead, select this setting to have the discount factored into the product total and deducted from the value.
Inventory Syncing

Sync Inventory
Enable if you want your inventory stock counts to be pulled in from Cubyn.
For more information, see the How to Work with Inventory Counts guide.
Sync Update Interval
If Sync Inventory is enabled, choose how often you want Order Desk to check Cubyn for inventory updates.
Product Settings

For more information on what these product settings in the Cubyn integration are for and how to use them, read the Fulfillment Integration Product Settings guide.
Shipping Class Match

To tell Cubyn what methods you want them to use, you will need to match your method names to theirs. This can be done in the shipping class match section. For detailed instructions on setting this up, please read through the shipping class match guide.
Order Level Details
The following details can be submitted with an order as either checkout data or order metadata. If you are unsure what these fields are, please contact Cubyn for more information.
| Field Name | Field Description |
| DeliverSigned | Set 1 for True or 0 for False if different from default setting. |
| PackingSlip | URL for the PDF to be included as the packing slip with the order. Details here. |
| IsAdvalorem | Set 1 to add insurance. Default is 0 for no insurance. |
| RelayPickupRef | Required when Default Mail Class is Relay. Check with Cubyn for values if needed. |
| CustomsHsCode | Harmonized System Code if different from default. Default is set in Cubyn’s system directly. |
| CustomsCategory | Set the customs category for a specific order. Default is COMMERCIAL. Other options are: GIFT, DOCUMENTS, COMMERCIAL_SAMPLE, RETURNED_GOODS, OTHER. |
| CustomsDescription | Use to describe contents in shipment. Default is blank if nothing is set. |
| CustomsOriginCountry | The country your shipment originated from. |
If you are unfamiliar with checkout data, see the How to Work with Checkout Data guide.