Checkout data is a versatile field in each Order Desk order that can be used to store information from the shopping cart, send information to a shipping or fulfillment service, and add custom information directly to the order in the app to aid in processing, filtering and organizing orders.
Manually Add Checkout Data
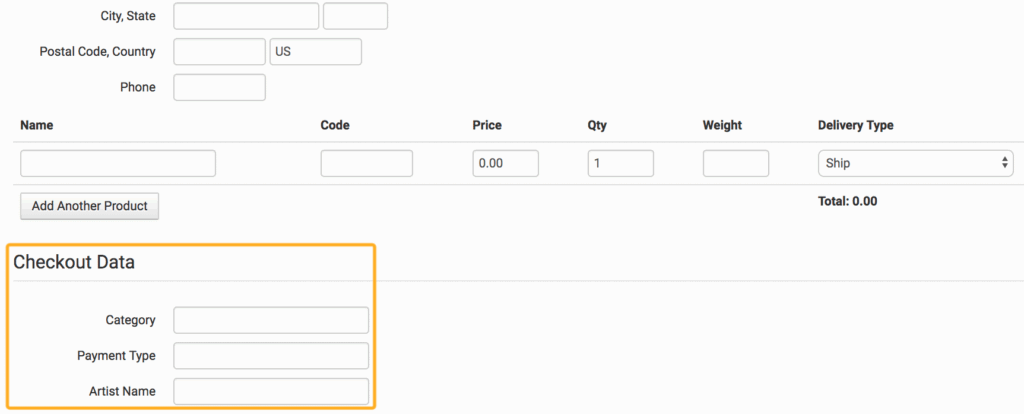
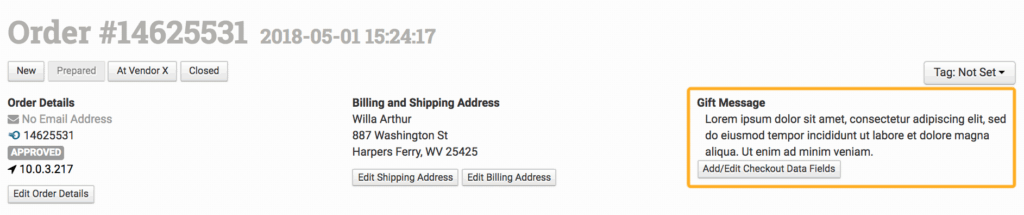
Checkout data fields can be found in the top right corner of an order page:
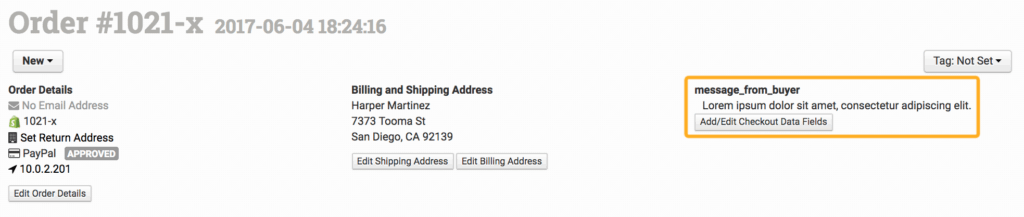
You can add, edit or remove checkout data at any time by clicking the Add/Edit Checkout Data Fields button.
Automatically add Checkout Data
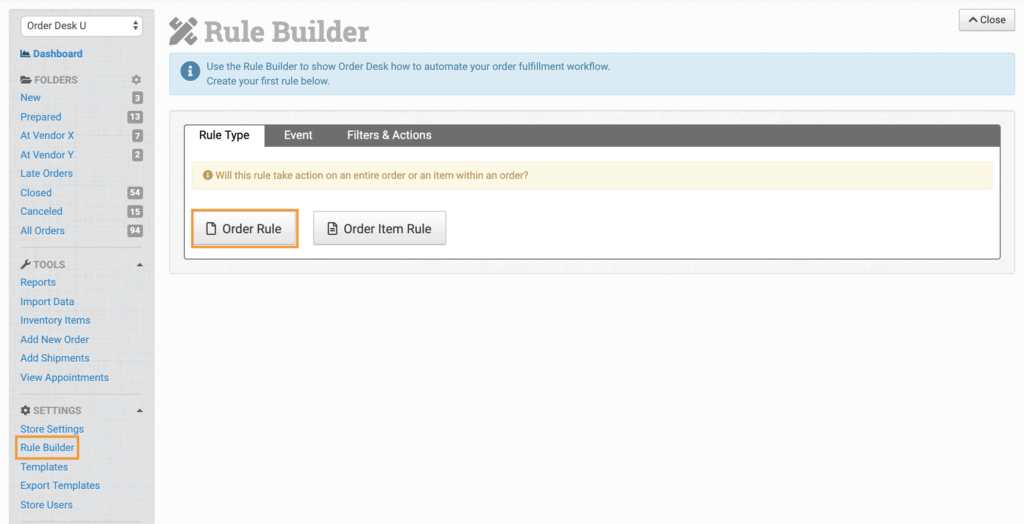
You can add specific checkout data with a rule to orders that meet your filters. To do this, in the Rule Builder, use the Order Rule rule type:
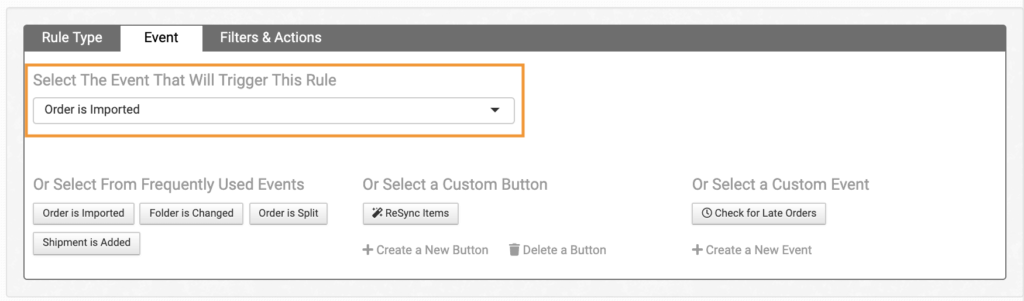
Select the event that needs to happen for checkout data to be added to an order. This will most likely be Order is Imported but will be your preference:
Under the Filters & Actions tab, select the Set Checkout Data Value action and add the field name and field values you want to use.
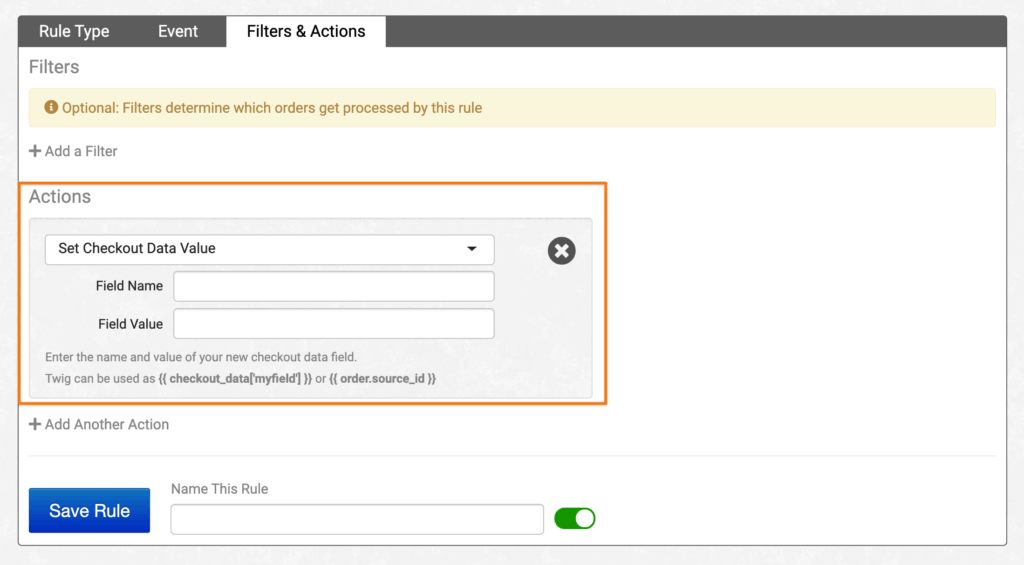
If you leave the value empty, it will apply just the field name so the value can be filled in later.
For more information on how to use the Rule Builder, see the How to Work with Rules guide.
Default Checkout Data Fields
In your Store Settings under the Defaults tab, you can add default checkout data fields.
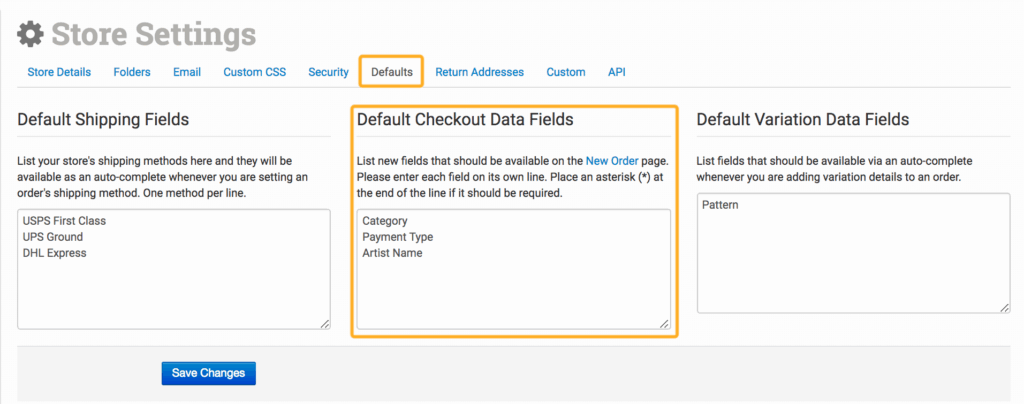
And fields added here will show up when adding a new order manually:
For more information on adding orders manually, please read this Getting Started guide.
Checkout Data from Shopping Carts
Some shopping cart integrations will apply certain fields sent through in an order as checkout data on the order.
The most common example of this is the gift message, which comes in under a different name from different shopping carts, such as message_from_buyer, gift_message, or Note. If your shopping cart sends this field through, check your orders to see what the field is called.
If you have this field on your orders, you can use it when exporting orders or sending them to different shipping or fulfillment integrations. Keep reading for instructions.
Send Checkout Data to Fulfillment Services
Many shipping and fulfillment integrations have a setting or special options to send checkout data to them.
Gift Message Field | Picklist Message Field
If your shipping or fulfillment integration has a Gift Message Field or a Picklist Message Field option, you’ll find it in the integration settings:
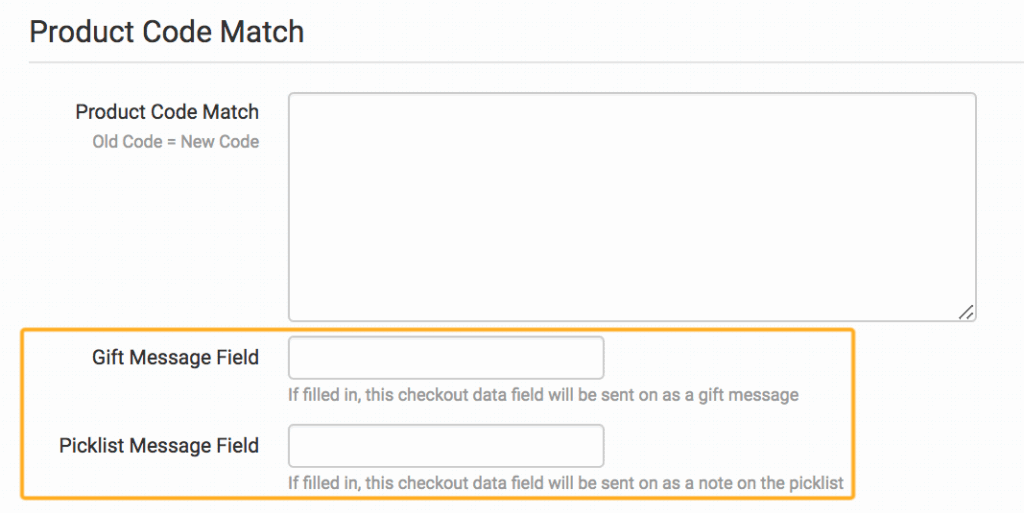
You can add a checkout data name to either of these. If the field name entered is on an order, it will be sent through to the shipping or fulfillment service with the order.
Customized Instructions
Many shipping and fulfillment integrations can accept customized instructions for an order. These instructions should be set as checkout data.
For instance, with 3PL Central, you can apply custom shipping instructions such as 3PL_BILLING_CODE and 3PL_SHIPPING_ACCOUNT. For Artsy Couture, you can send a PDF through as PackingSlip. There are many other options for both of these integrations and many other integrations that also have this feature.
Check the help guides for your integrations to find out if they support this feature, and, if so, which checkout data field names you can pass through to each service.
Custom Folder View
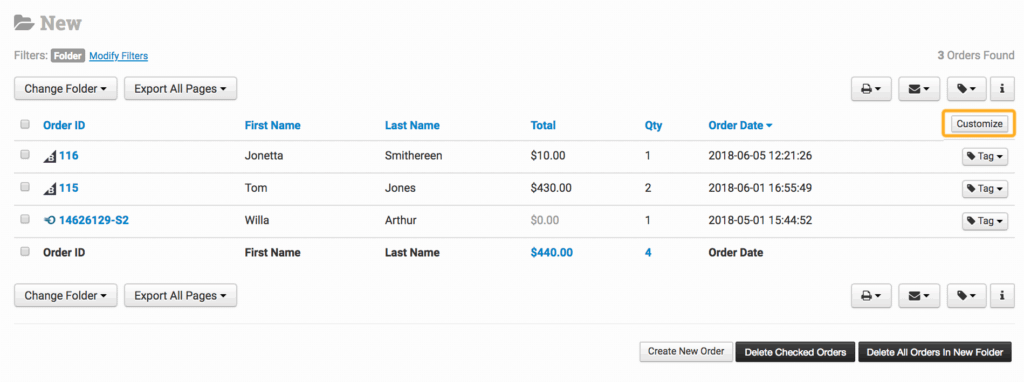
If you have a specific checkout data field on your orders that you want to view from the folder view, you can add it by clicking on the Customize button in the folder.
Scroll to the bottom of the page under Available Columns and on the right side where it says Add Checkout Data Field, type in the specific checkout data field name that is on your orders that you want displayed as a column in the folder view, for instance “Gift Message”.
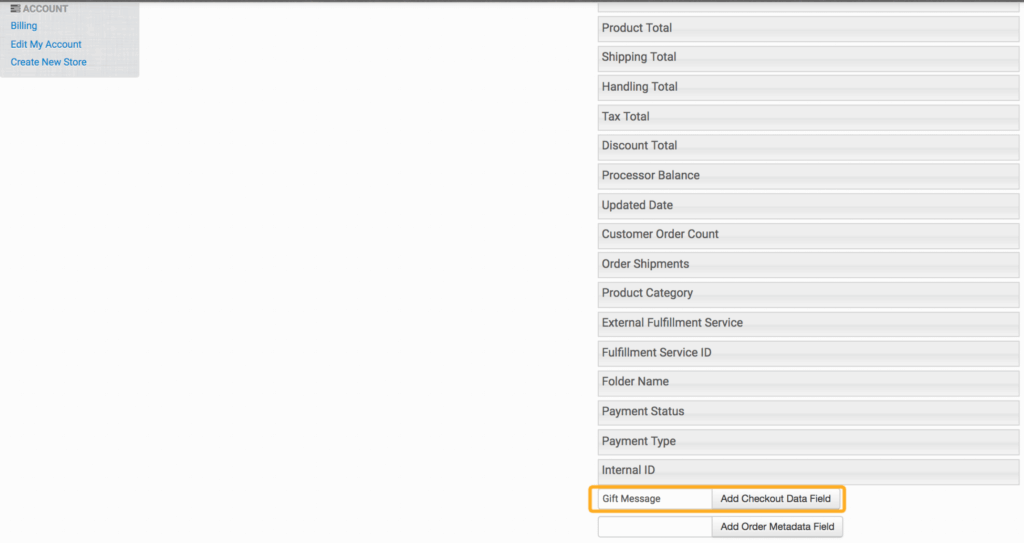
Click the Add Checkout Data Field button and scroll up to see the field in your list of columns for the folder you are in.
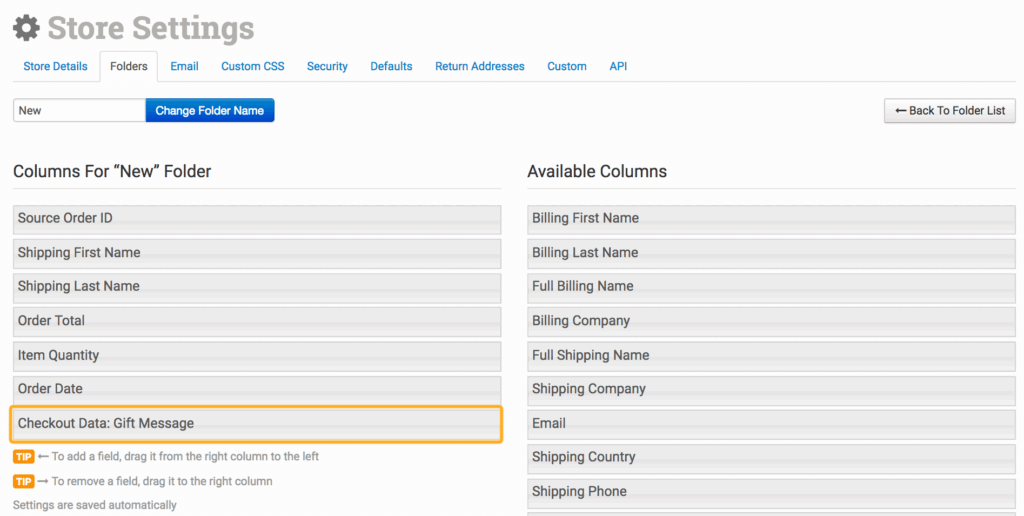
Drag the columns up or down to place them in the order you want them displayed.
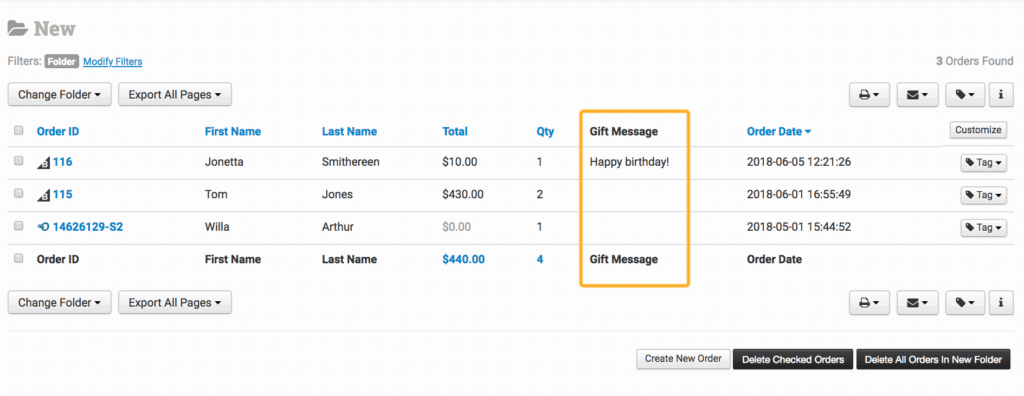
Now when viewing the folder, any orders with the same checkout data field in them will display that information in the column.
Map Checkout Data in Import and Export Templates
Import Checkout Data
When setting up an import template for orders, if you want to add a column from your file as a specific checkout data field, select Checkout Data Field from the Field Setup dropdown and replace the ? in checkout_data|? with the name you want to apply to your checkout data:
For more information on building import templates, see the How to Import a Spreadsheet guide.
Export Checkout Data
When setting up an export template, if you want to add checkout data to the file, select Single Checkout Data Field from the Order Fields section and replace the ? in {checkout_data|?} with the name of the field in your orders that you want to export. This must be an exact match to the field in your orders and is case-sensitive.
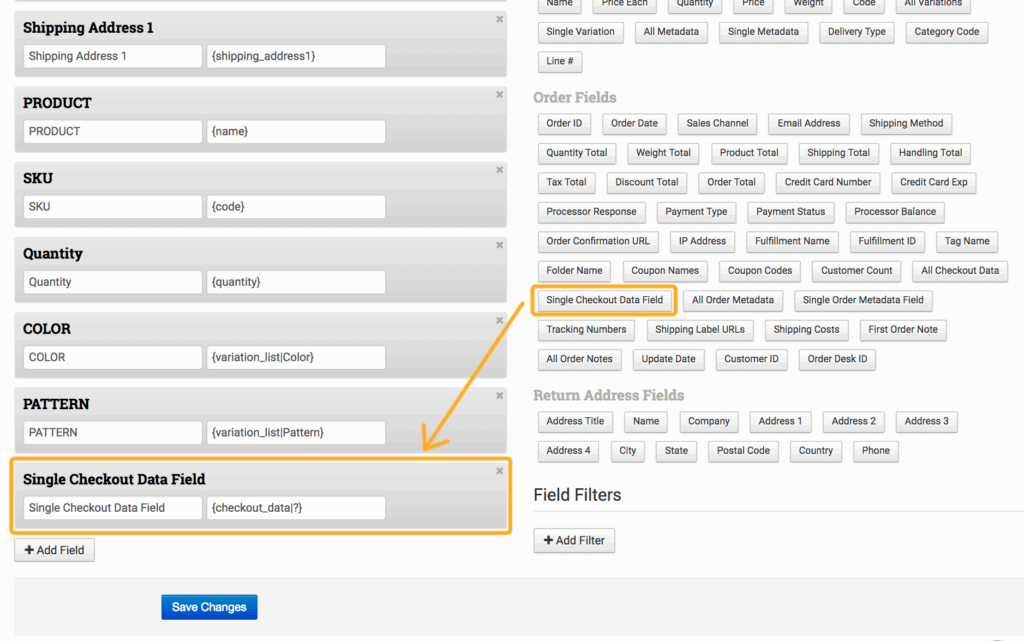
You can also rename the column header to whatever you need to call it.

For more information on building export templates, see the How to Build Export Templates guide.
Special Features
If you are familiar with Twig, you can customize checkout data even further. The following are a few common examples of what can be done with a little creativity and some code.
Fraud Risk
Flag orders where the shipping and billing countries don’t match by creating a rule with this as the checkout data:
risk| {% if shipping.country != customer.country %}{{ "check for fraud" }}{% else %}{{ "none" }}{%endif %}
Cost Total
If you want to add up the total cost of items in an order, make sure you have cost set in the inventory, that your inventory syncs into your orders, and then create a rule with this code:
Cost Total| {% set cost = 0%}{% for item in order_items %}{% set cost = cost + item.metadata.inventory_cost * item.quantity %}{% endfor %}{{ cost }}
Timestamp
Apply a date or time stamp on an event by naming your checkout data field and adding this code to apply the current date (and/or time) when the rule runs:
Fulfilled On| {{ "now"|date("Y-m-d") }}
Click here for a PHP reference on date and time formats.
FAQ
What’s the difference between checkout data and order metadata?
Checkout data and order metadata are virtually the same thing, but checkout data is a little bit easier to work with if you’ll need to make changes or updates on the spot. Checkout data is stored at the top right of an order page. You can add, edit or delete checkout data manually, or you can add it with a rule.
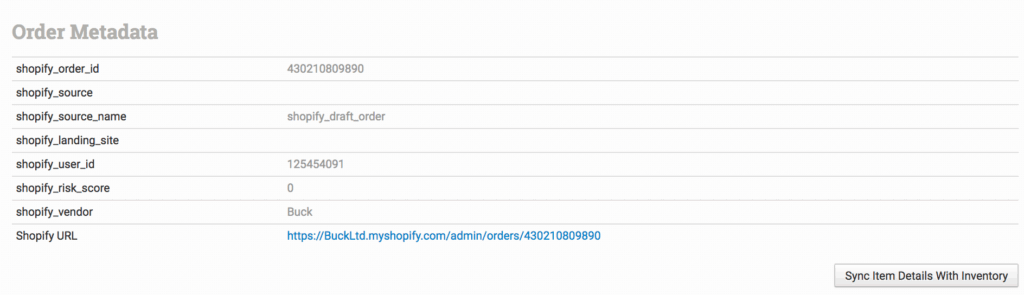
Order metadata is stored at the bottom of the order page, typically comes in with an order from a shopping cart, and it can’t be edited. It can only be added with a rule or an import template otherwise.
I’m trying to export checkout data in a file, but it’s blank. What’s going wrong?
When working with checkout data, keep in mind that it is case sensitive and must be an exact match. If the checkout data field on your orders is “Note”, but in the file, you’re exporting {checkout_data|note}, the field will be empty. It should be {checkout_data|Note}.
This also applies to spelling and spaces. Make sure the checkout data field you add to your orders is exactly the same on every order and exactly the same in any templates you add it to.
How can I add checkout data to an email and receipt template?
Email templates and receipt templates require the code to be formatted a little differently.
Email Templates
For email templates, if you want to add all of your checkout data fields to the template, use this code:
{% if checkout_data|length > 0 %}{% for key, val in checkout_data %}<b>{{ key }}:</b> {{ val }}{% endfor %}{% endif %}
But if you want to only single out a specific checkout data field, use this code, replacing xxx with the name of the field:
{% if checkout_data['xxx'] is defined %}{{ checkout_data['xxx'] }}{% endif %}
Be mindful of spaces, capitalization and punctuation. For instance, if you want to include the checkout data field “Order Note”, use this:
{% if checkout_data['Order Note'] is defined %}<b>Order Note</b>: {{ checkout_data['Order Note'] }}{% endif %}
Receipt Templates
For receipt templates, if you want to add all of your checkout data fields to the template, use this code:
{% if order.checkout_data|length > 0 %}{% for key, val in order.checkout_data %}<li><b>{{ key }}:</b> {{ val }}</li>{% endfor %}{% endif %}
But if you want to only single out a specific checkout data field, use this code, replacing xxx with the name of the field:
{% if order.checkout_data['xxx'] is defined %}{{ order.checkout_data['xxx'] }}{% endif %}