Order Desk can import orders from your shopping cart(s), apply custom information and then submit them to Ongoing Warehouse Management Systems (WMS) for fulfillment. When orders are shipped, the tracking details will be sent back to Order Desk and back to your shopping cart(s) if your store is set up for it.
Setup
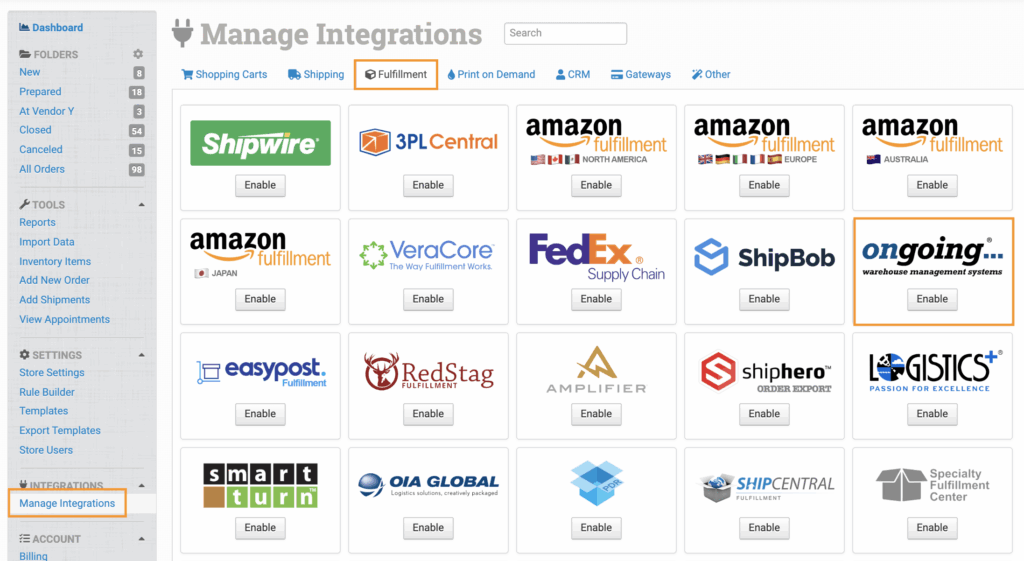
To connect to Ongoing WMS, click on the Manage Integrations link in the left sidebar and under the Fulfillment tab find and enable the Ongoing WMS integration.
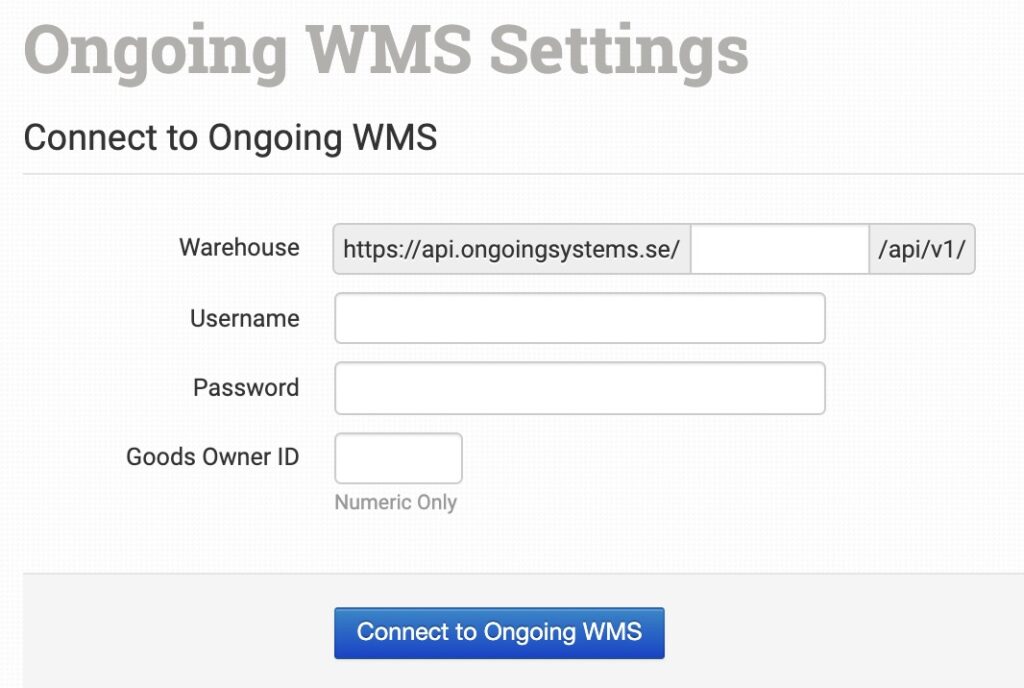
Once enabled, enter your Ongoing WMS credentials and click to connect.
Integration Settings
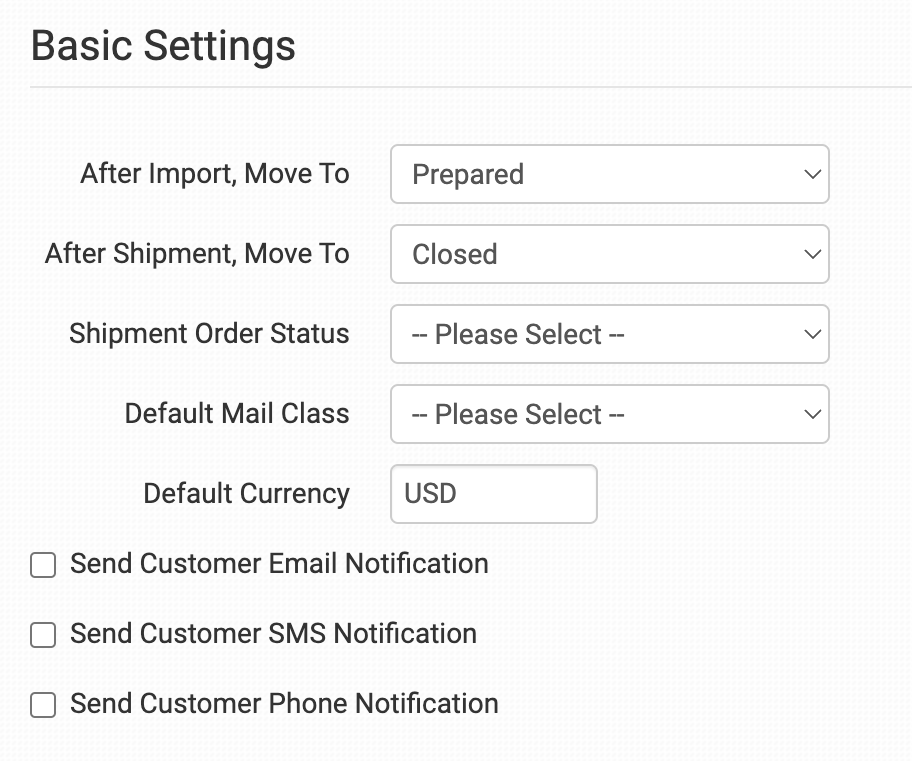
After Import, Move To
Select the folder you want orders to be moved into after they are successfully sent to Ongoing WMS.
You can use one of the default folders already in your store or create your own. Read the Working with Folders guide for more information.
After Shipment, Move To
Select the folder you want orders to be moved into as Ongoing WMS sends shipment details back to Order Desk.
Shipment Order Status
Select the order status for shipment checks. If left blank, shipment status will be pulled only if already available.
Default Mail Class
Choose the shipping class you want Ongoing WMS to use for your orders.
If you need to apply specific methods for certain orders, match your method names to the names Ongoing WMS uses in the Shipping Class Match section below.
Default Currency
Set your store’s currency.
Send Customer Email Notification
Send customers an update on their order via email.
Send Customer SMS Notification
Send customers an update on their order via SMS.
Send Customer Phone Notification
Send customers an update on their order via phone.
Inventory Settings
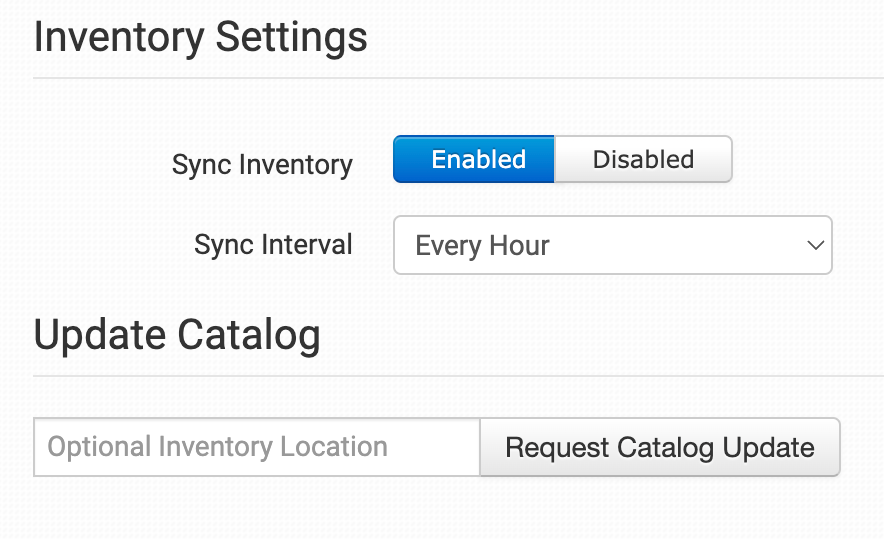
Sync Inventory
Enable if you want Order Desk to send inventory counts to Ongoing WMS as they are added to Order Desk.
Sync Interval
If Sync Inventory is enabled, choose how often you want Order Desk to check Ongoing WMS for inventory updates.
Update Catalog
Use to upload Order Desk inventory items as articles in Ongoing WMS.
Product Settings
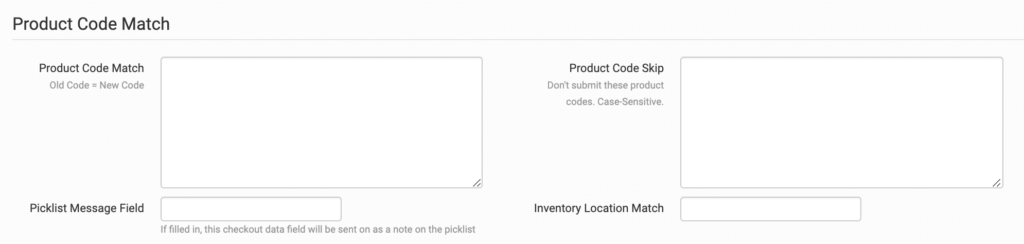
For more information on what these product settings in the Ongoing WMS integration are for and how to use them, read the Fulfillment Integration Product Settings guide.
Shipping Class Match

If the shipping methods you set up in your shopping cart(s) don’t match the shipping method names Ongoing WMS uses, they won’t know what methods you intend for them to use. When this happens, the default mail class applied above will be used instead for all of your orders.
To tell Ongoing WMS what methods you want them to use, you will need to match your method names to theirs. This can be done in the shipping class match section. For detailed instructions on setting this up, please read through the shipping class match guide.
Sending Orders to Ongoing WMS
Order Level Details
The following details can be submitted with an order as either checkout data or order metadata. If you are unsure what these fields are, please contact Ongoing WMS for more information.
| Field Name | Field Description |
| SalesCode | Set the sales code on the order. |
| DeliveryInstructions | Provide delivery instructions with the order. |
| ServicePointCode | Set the service point code on the order. |
| OrderType | Set the order type. |
| Remark | Set a remark on the order. |
| DoorCode | Set the door code on the order. |
| PackingSlip | URL for the PDF to be included as the packing slip with the order. Details here. |
If you are unfamiliar with checkout data, see the How to Work with Checkout Data guide.
Item Level Details
The following can be set as item metadata or a variation.
| Field Name | Field Description |
| SerialNumber | Set the serial number on the item. |
| NotPicked | Set to 1 if the item should be marked as not to be picked (virtual item). |