Order Desk provides a sample receipt template and the ability to create custom order documents out of the receipt. Use these templates to create and send a receipt to your customers, send a packing slip to your vendors, add barcodes, make PDFs, factor in specific VAT tax amounts, create purchase orders, or create invoices or any other custom order documents as necessary.
You can customize each receipt template to pull any information from an order in Order Desk, and it can be designed to fit your brand.
Create Receipt Templates
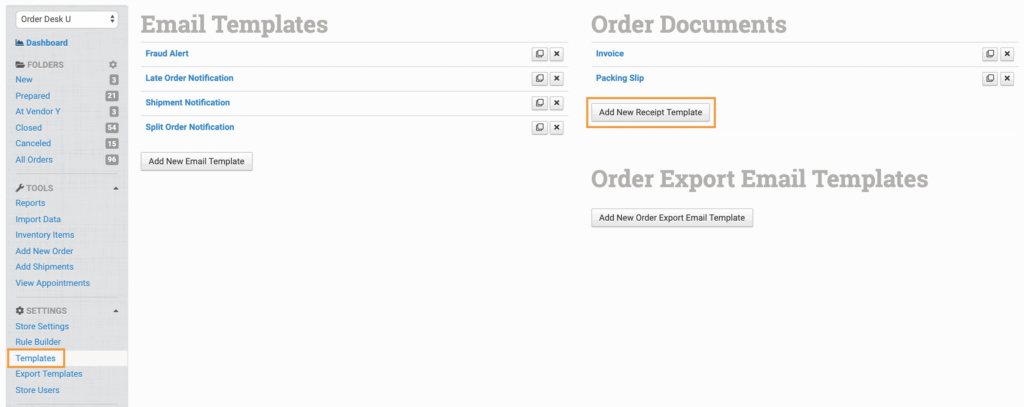
To create a receipt template, click on Templates in the Settings menu in the left sidebar. Under the Order Documents section, click on Add New Receipt Template.
The default receipt template will be added.
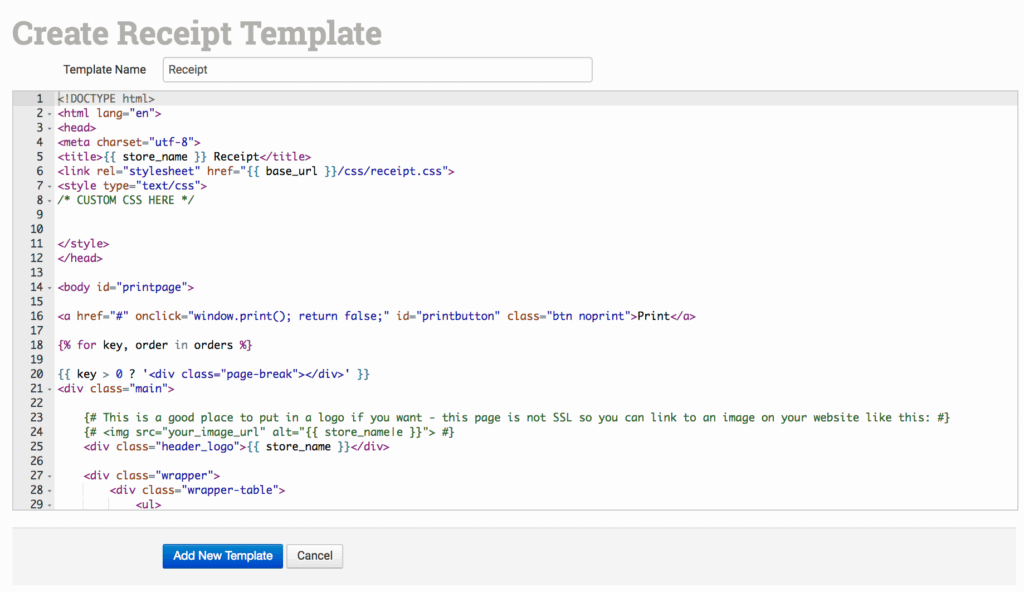
You can either use this template as is, delete it and replace it with another template, delete it to create your own template, or edit it to include the specific information and customizations you want.
Sample Templates
Some sample receipt templates already exist and can be found here. You can use or customize any of these to fit your needs.IMPORTANT
Receipt templates and email templates do not use the same syntax. The code that works in a receipt template will not work if copied into an email template. Click here for more details on working with email templates.
Edit Receipt Templates
When starting with the default receipt template, to edit or replace the body of the template, you will need at least some knowledge of HTML.IMPORTANT
Using code or templates copied from other websites will not work. If you wish to customize your templates but are unfamiliar with code, please work with a skilled designer or developer.
There are two parts to a receipt template, the name and the code. Give your template an easy to identify name, especially if you plan to make several different templates.
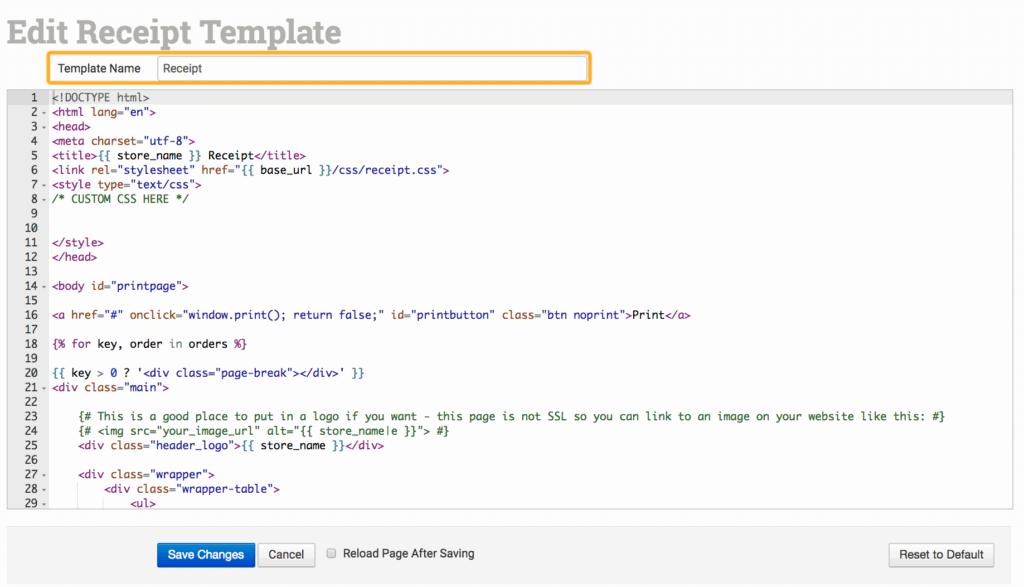
If you wish to change the type of template from receipt to something else, change the title on lines 5 and 30 from Receipt to what you want it called, such as Invoice or Packing Slip:
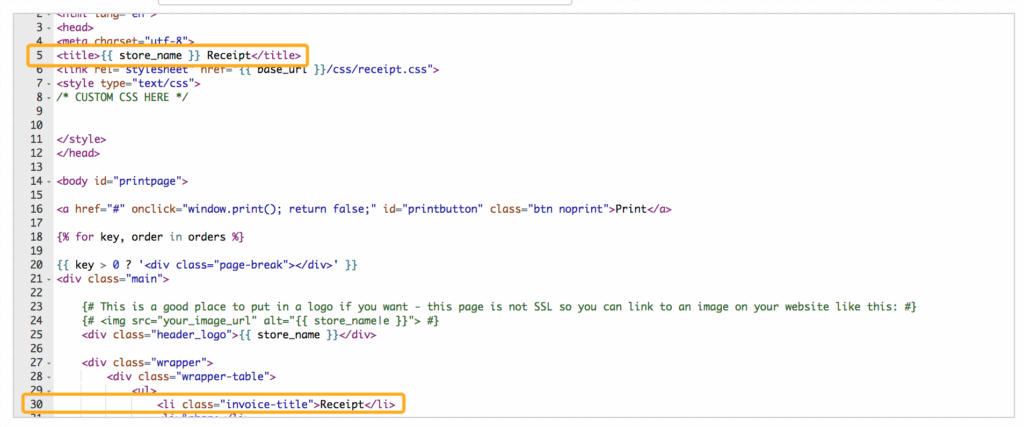
To do this, simply replace the word “Receipt” on both lines. Do not change any of the code:

Code Examples
Receipt templates require the order to be called in the key using order. before the key name. For keys that have a subset of information (order_items, order_notes, etc.) add the order. before the key and use the field names as usual from there.
In the following code, where you see an ‘xxx’, replace it with the name you are using for that particular field in your orders. For example, if adding the Size variation, change:
{{ item.variation_list['xxx'] }}
to{{ item.variation_list['Size'] }}
This is case sensitive.
For a full list of values, please refer to our API docs, keeping in mind the syntax necessary for receipt templates.
General Order Properties
{{ order.store_name }}
{{ order.source_id }}
{{ order.quantity_total }}
{{ order.weight_total }}
{{ order.product_total }}
{{ order.shipping_total }}
{{ order.handling_total }}
{{ order.tax_total }}
{{ order.discount_total }}
{{ order.order_total }}
Address Information
{{ order.shipping.first_name }}
{{ order.shipping.last_name }}
{{ order.shipping.address1 }}
{{ order.shipping.city }}
{{ order.shipping.state }}
{{ order.shipping.postal_code }}
Customer Information
{{ order.customer.first_name }}
{{ order.customer.last_name }}
{{ order.customer.company }}
{{ order.customer.address1 }}
{{ order.customer.city }}
Item Information
{% for item in order.order_items %}
{{ item.name }}
{{ item.code }}
{{ item.quantity }}
{{ item.price }}
Item Metadata
{% if item.metadata.xxx is defined %}
<td>{{ item.metadata.xxx }}</td>
{% endif %}
Variations
{% if item.variation_list|length > 0 %}
{% if item.variation_list[‘xxx’] is defined %}
{{ item.variation_list[‘xxx’] }}
{% endif %}
{% endif %}
or
{% if item.variation_list[‘xxx’] is defined %}
{{ item.variation_list[‘xxx’] }}
{% endif %}
Checkout Data
{% if order.checkout_data[‘xxx’] is defined %}
{{ order.checkout_data[‘xxx’] }}
{% endif %}
Order Metadata
{% if order.order_metadata.xxx is defined %}
{{ order.order_metadata.xxx }}
{% endif %}
Order Notes
All Notes
{% for note in order.order_notes %}
{{ note.content }}
{% endfor %}
First Order Note Only
{{ order.order_notes[0].content }}
Order Shipments
Display All Tracking Numbers
{% for shipmentkey, shipment in order.order_shipments %}
{% if shipment.tracking_number %}
{{ shipment.tracking_number }}
{% endif %}
{% endfor %}
Display First (if Only) Shipment Details
{{ order.order_shipments.0.carrier_code }}
{{ order.order_shipments.0.shipment_method }}
{{ order.order_shipments.0.weight }}
{{ order.order_shipments.0.cost }}
{{ order.order_shipments.0.tracking_url }}
View or Print Receipts
To view or print a receipt template, click on the printer icon in an order. A dropdown will appear with all of your receipt templates.
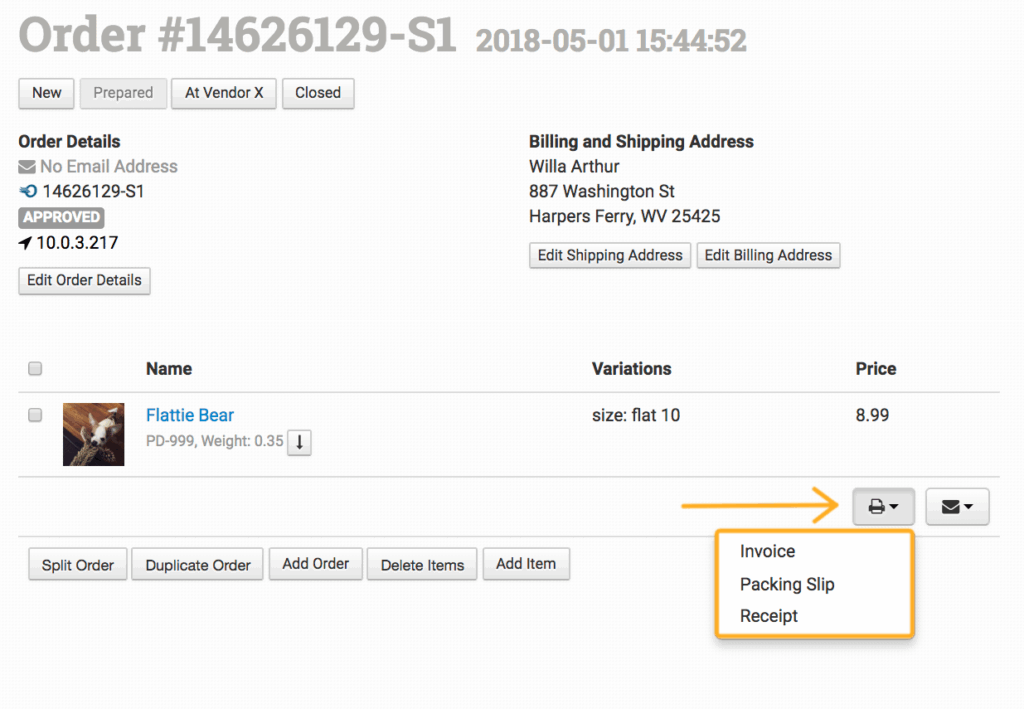
Choose the template you want to see for the order, and your receipt will be created in a new browser window.
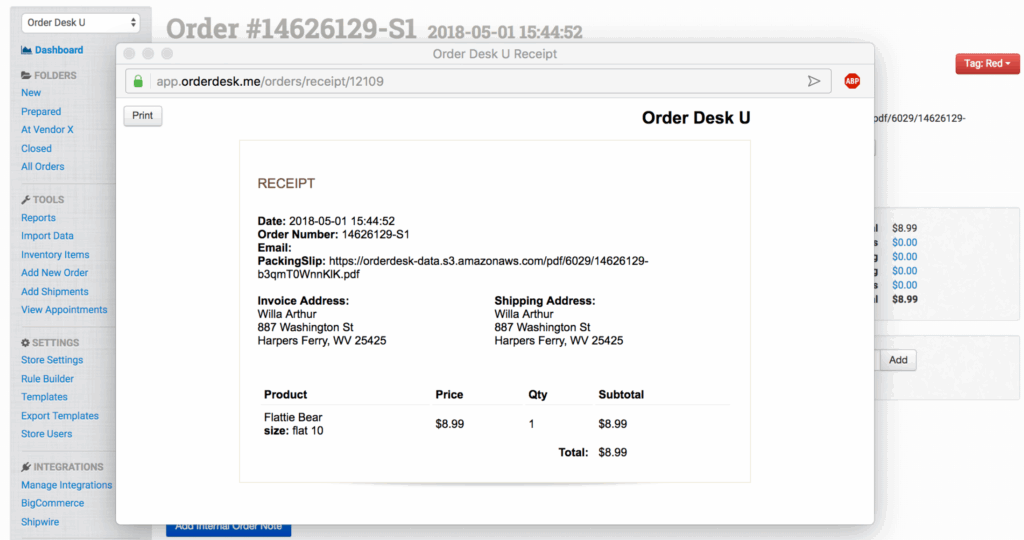
You can save or print this page following the usual prompts for your specific browser and printer.
If you want to view or print multiple receipts at once, select the orders from the folder view and click the printer icon.

All of the receipts for the selected orders will populate in a single window, in order, to be viewed or printed.
Create PDFs
If you want to turn your receipt template into a PDF, follow the instructions in this guide. Also included are instructions for how to attach a PDF to an email or send a packing slip with an order to certain fulfillment services.
FAQ
I need help with my code, but you keep telling me to hire a developer. Come on, do me a favor—it’s your app, shouldn’t you help?
We get it; code can be difficult, which is precisely why we tell you to hire a skilled developer or designer. The templates we provide work for most scenarios, but if you aren’t able to customize them yourself, we do ask that you hire a skilled professional to take the time necessary to write your code.
We appreciate your understanding that the Order Desk team is not your personal designer or developer.
I need an invoice, packing slip, etc., not a receipt. How do I do that?
Receipt is the default name for these templates. You can change the name of the template to anything you need and change or remove “receipt” from the code. These templates are customizable so you can make them anything you want them to be.
If you need to create purchase orders, you can do this with receipt templates as well, customized to your own purposes. If working with purchase orders, make sure that orders that have not been paid for yet are not sent for fulfillment until ready by using custom folders and rules to help you manage your order process.
Why doesn’t the code I copied from an email template work in my receipt template?
The syntax necessary for email and receipt templates is different. What works in one won’t work in the other. Email templates look at a single order, so the fields listed in the field reference and in the email template guide should work.
Receipt templates look at a list of orders, so most fields will typically need to have order. added to them. Where an email template uses {{ source_id }} to show the order number, the receipt template requires {{ order.source_id }} for the same. Look at your default receipt template for examples or scroll up to the code section of this guide for more examples.