> For the complete documentation index, see [llms.txt](https://help.orderdesk.com/llms.txt). Markdown versions of documentation pages are available by appending `.md` to page URLs; this page is available as [Markdown](https://help.orderdesk.com/guided-walkthroughs/products-and-inventory/how-to-sync-inventory-between-order-desk-stores.md).
# How to Sync Inventory Between Order Desk Stores
If you have more than one Order Desk store on your account, you can push your products from one store to another and keep the details and quantities synced between them.
If you are unfamiliar with managing multiple stores on your Order Desk account, please first see [this guide](/guided-walkthroughs/using-order-desk/how-to-manage-multiple-stores-on-one-account.md) for more information.
For more information on managing inventory in a single Order Desk store, see the [How to Work with Inventory Details](/guided-walkthroughs/products-and-inventory/how-to-work-with-inventory-details.md) and [How to Work with Inventory Quantities](/guided-walkthroughs/products-and-inventory/how-to-work-with-inventory-quantities.md) guides.
### How Inventory is Synced
Each Order Desk store can be set up to manage its own inventory, independent of your other Order Desk stores.
In some cases, you may need inventory to stay synced across Order Desk stores, for instance, if you have multiple shopping carts or marketplaces that need to know the quantity in stock for the same items. Rather than updating each store manually with this information, you can tell Order Desk to push the products and their quantities from one store to another.
If enabled, whenever inventory items from the main store that do not exist in the selected store(s) are added, they will also be added to the other stores selected. Updates made to the inventory will be pushed to the selected store(s), and the quantity from the main store will override the quantity from the selected store(s) if different. These updates will happen automatically whenever changes are made to the inventory in the main store.
### How to Enable Sync on Your Stores
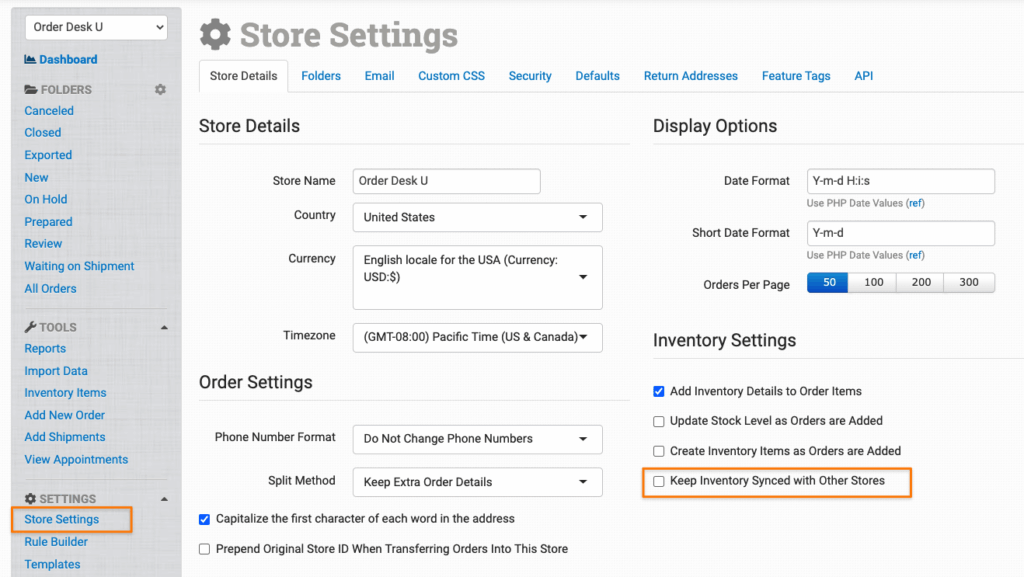
To enable this setting, click on **Store Settings** from the left sidebar under the Settings menu and select the **Keep Inventory Synced with Other Stores** option.
Once you turn this on, you’ll also see the option to **Create Non-Existing Inventory in the Other Stores**. Turn this on if you want Order Desk to create inventory items in the other stores when they don’t already exist there.
Next, use **Fields to Sync** to choose whether you want to sync all item details from this store or just the stock counts. Then choose the stores you want to sync with.
{% hint style="warning" %}
If you choose **All Item Details**, the item data in the other stores will be overwritten with the data from this store. If you only want to keep stock counts in sync and leave the rest of the item data alone, choose **Stock Count Only**.
{% endhint %}
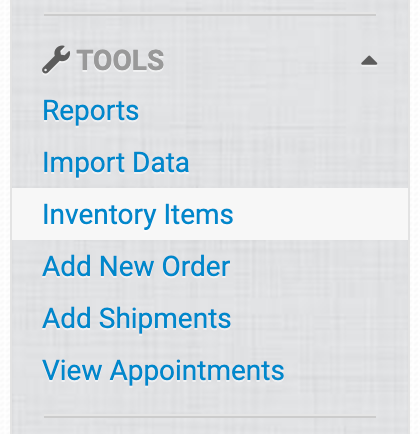
This will work on all inventory updates moving forward, however, if you need to push all of your inventory from one store to another to make sure they’re in sync, you can do so by going to the Inventory Items page in your main store:
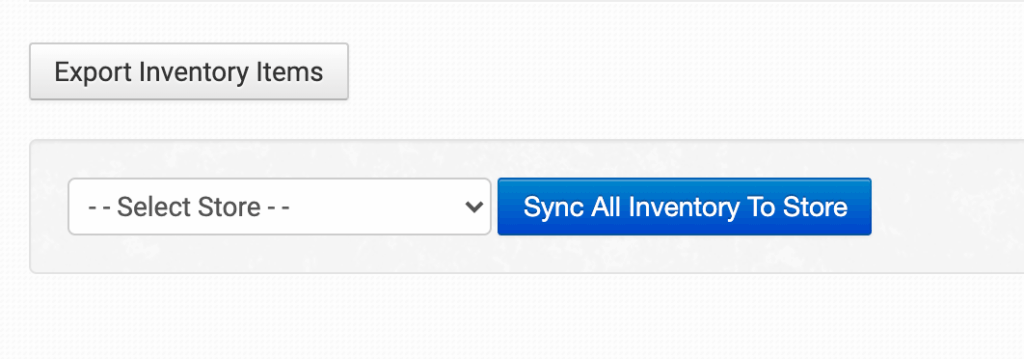
And at the bottom of the page, selecting the store you want to send all of the inventory to:
### Notes
If the same field is on an item in two or more stores but the values are different for that field, the item in the selected store(s) will be updated with the value from the main store.
If you have added users to your stores, but they do not have access to some of the stores selected from the main store, they can unintentionally override this setting by visiting the Store Settings page and saving the settings. Users must have access to all selected stores to be able to work in the Store Settings page.
---
# Agent Instructions
This documentation is published with GitBook. GitBook is the documentation platform designed so that both humans and AI agents can read, navigate, and reason over technical content effectively. Learn more at gitbook.com.
## Querying This Documentation
If you need additional information that is not directly available in this page, you can query the documentation by asking a question.
Perform an HTTP GET request on the following URL with the `ask` and `goal` query parameters:
```
GET https://help.orderdesk.com/guided-walkthroughs/products-and-inventory/how-to-sync-inventory-between-order-desk-stores.md?ask=&goal=
```
`ask` is the immediate question: it should be specific, self-contained, and written in natural language.
`goal` is what the user is ultimately trying to achieve, the reason they need the answer. Sharing it helps GitBook give you a better, more relevant answer. A goal is most helpful when it describes the outcome the user wants rather than restating the question. For example, with `ask=how do I create an API token`, a goal like `automate deployments from our CI pipeline` lets GitBook tailor the answer to that use case.
The response will contain a direct answer to the question and relevant excerpts and sources from the documentation.
Use this mechanism when the answer is not explicitly present in the current page, you need clarification or additional context, or you want to retrieve related documentation sections.