Use imgix to process your print on demand images in real time, after the file has already been stored online and the shareable link created. This is ideal if you need to adjust images that already exist to get them ready for print, such as adding padding, trimming, or rotating. For a full list of what imgix can do, please refer to their documentation.
Please note that using this service requires advanced technical knowledge.
Setup
To use imgix, you will first need to set up your own imgix account following their instructions.
Once your account is created and set up at imgix, you can enable the imgix integration in Order Desk. Click on Manage Integrations under the Integrations menu in the left sidebar. Under the Productivity tab, find and enable imgix.
Integration Settings
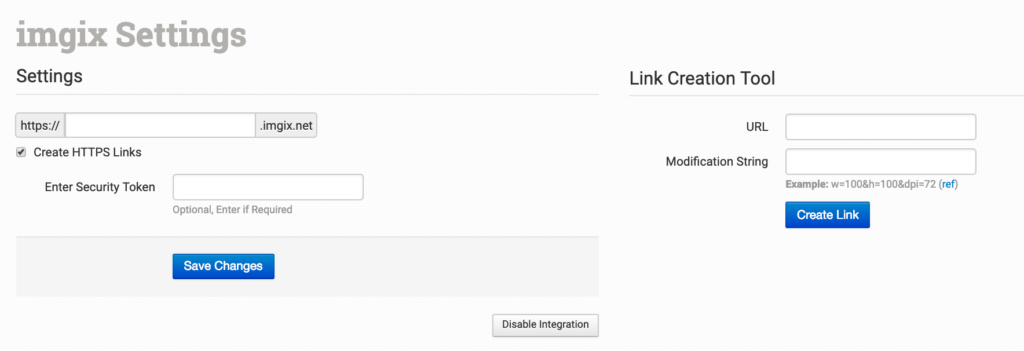
Once enabled, add the imgix subdomain name you created while creating your imgix account.
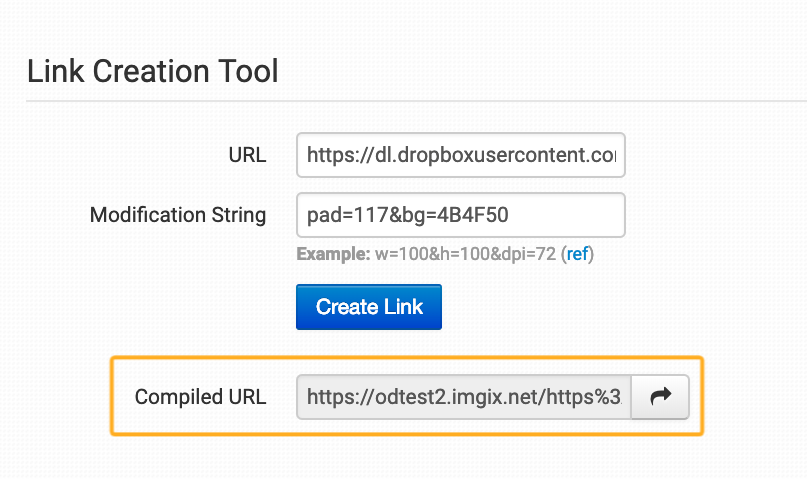
Link Creation Tool
Add the URL of your hosted image to be modified in the URL field of the Link Creation Tool.
If you are using Dropbox, the URL of the image needs to be in one of two formats:
- Click on Share on the file in Dropbox and make sure anyone who has the link can view the file. Copy everything after the dropbox.com/ and place it after https://dl.dropboxusercontent.com/ and use this URL.
- Click on Share on the file in Dropbox and make sure anyone who has the link can view the file. The end of the URL will have ?dl=0. Change the 0 to 1, so it is ?dl=1 instead, and use this URL.
Within imgix’s help documentation, select and create the modification string needed to update your image. As an example, adjust the padding to be added around your image from here.
Underneath the image, find the modification string:
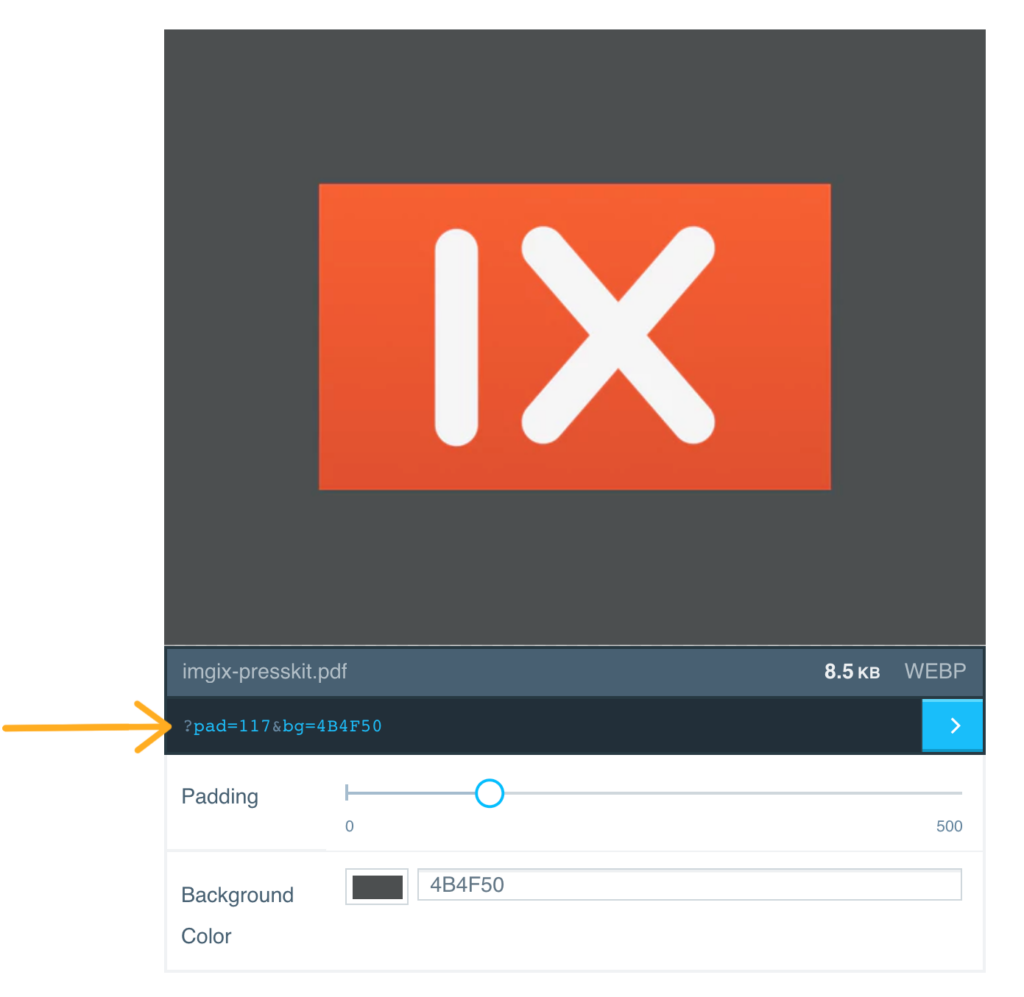
Remove the ? from the beginning and place this in the Modification String field in Order Desk then click Create Link. Your modified image will be available in the Compiled URL field: