If you want to take action on orders based on a time, you can apply timestamps to your orders and then set up custom events and rules to watch the timestamp and apply the actions when you want.
This guide covers how to set a timestamp on an order with a rule, how to create a custom event to regularly check the orders in a specific folder, and how to use a rule to apply actions at the appropriate time.
Add Timestamp to Orders
IMPORTANT
If you only need to know when a certain amount of time has passed since the order was created, use the If Order Date Created filter instead of setting a timestamp. Follow the instructions in the rest of this guide for how to search against the date created time.
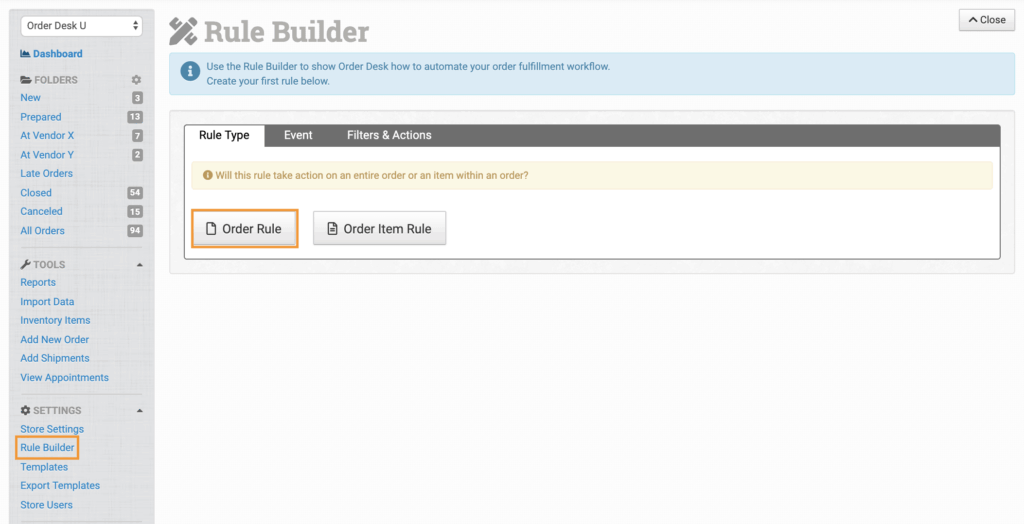
To add a timestamp to your orders, click Rule Builder under the Settings menu in the left sidebar and select the Order Rule rule type.

Choose the event you want your rule to run on. This event is when the timestamp will be applied, such as when the order is imported, when it moves into a certain folder or when the shipment is added.

Add any filters to the rule if you need to only apply the timestamp to certain orders.
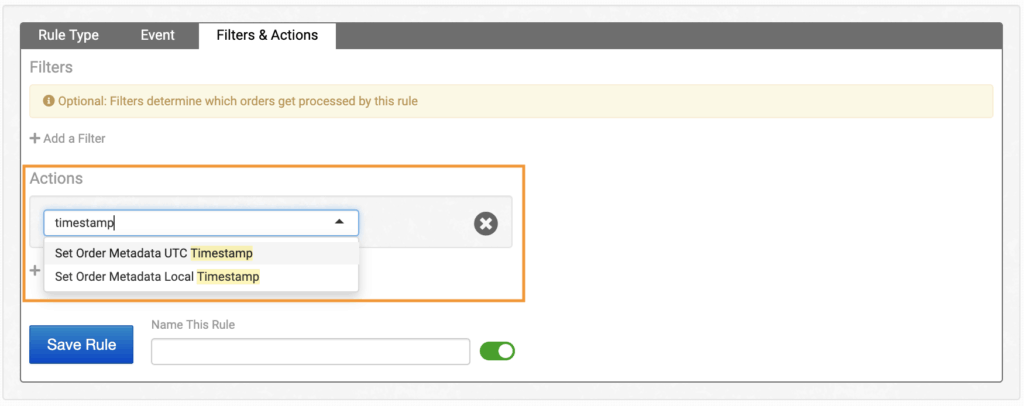
Select one of the two timestamp actions as the action:

Set Order Metadata Local Timestamp will apply the timestamp in your store’s local time, which is determined by your Store Settings.
Set Order Metadata UTC Timestamp will apply the timestamp in UTC time. If you are going to create a custom event to regularly check for timestamps, use UTC time. When custom events run, they look at UTC time and will apply to that time if different from the store’s timezone. If you notice that your custom events aren’t acting on orders at the right time, check that your rule is applying UTC timestamps rather than local timestamps.
After choosing your timestamp action, name your timestamp any custom name you want to call it:

When your rule runs, a timestamp will be added to the order metadata of any order the rule applies to:

Create Custom Event
A custom event is an event that you create in your store to run on one specific folder. You can choose how often the event runs and which folder you want it to run on.
If you haven’t already created the folder you want your event to run on, do that now.
To create a custom event, follow the steps in this guide, then come back to finish these steps.
A custom event by itself will not do anything to your orders, but the next step will be to create a rule that runs when the custom event looks at your folder, if all the filters in the rule apply.
Apply Action to Orders
When creating a rule, the first step is to select the event you want the rule to run on. You’ll now find your custom event as one of the available events:

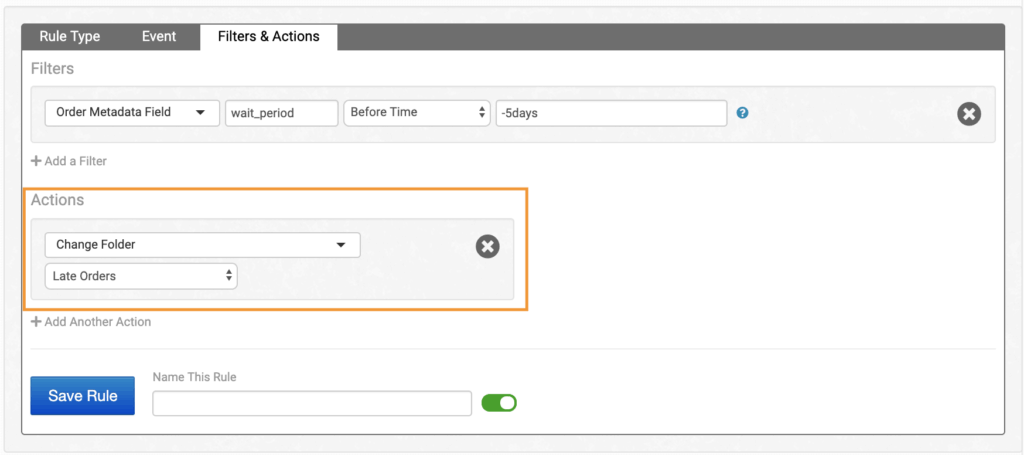
This rule requires a filter to check against the timestamp in the order, which will be found in the order metadata, so select Order Metadata Field as the filter type:

In the Field Name, add the name you gave to the timestamp. This must be an exact match:

Choose the before time operator and then add the amount of time you want to have passed, followed by a – sign:

Examples:
wait_period before time -5days means to wait until 5 days or more after the time of the wait_period timestamp.
wait_period before time -10minutes means to wait 10 minutes or more after the timestamp time for the filter to be true.
If the timestamp on an order is set right at 12:00:00, before time -10minutes will be true at 12:10:00, and the next time your custom event scans the folder, the rule will apply to the order.
To finish the rule, select any actions you want to have happen when the filter becomes true against the timestamp:
