
Order Desk can import orders from your shopping cart(s), sync in your print details and then automatically send them on to Dubow for fulfillment. When orders are shipped, the tracking details will be sent back to Order Desk and back to your shopping cart if your store is set up for it.
Setup
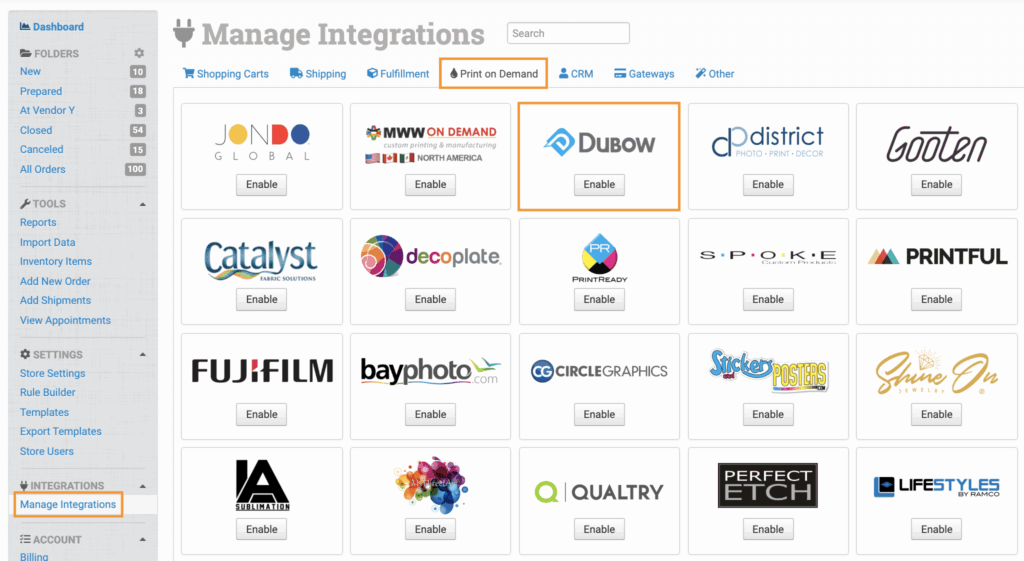
To connect to Dubow, click on the Manage Integrations under the Integrations menu in the left sidebar. Under the Print on Demand tab, find and enable Dubow.
Enter the API credentials Dubow provides you with and then click to connect.
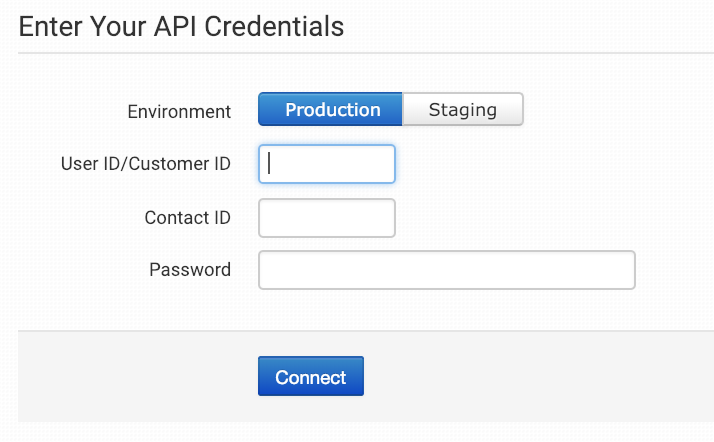
To find your Dubow credentials, please contact your rep from Dubow. Order Desk support is not able to help with finding or resetting your [Integration] credentials, as they are created and provided by Dubow.
Integration Settings
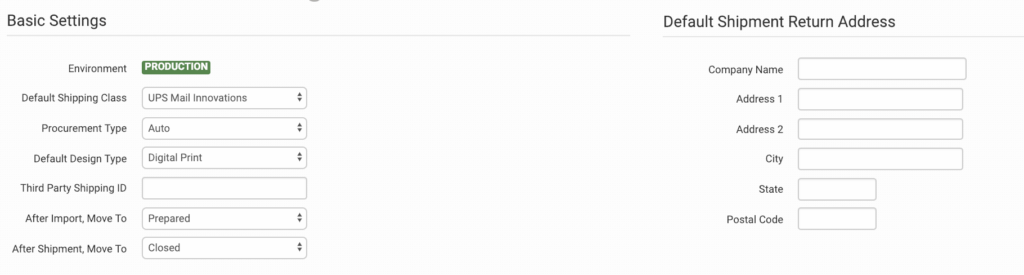
Once connected, you’ll have some shipment and integration settings to adjust per your preferences.
Default Shipping Class
Choose the shipping class you want Dubow to use on any orders where the shipment method is not otherwise specified for them to use.
To set up more specific shipping options, you will need to match your method names to Dubow’s. This can be done in the shipping class match section.
Procurement Type
Select your procurement type; Auto is recommended. If Auto is selected, Order Desk will build full SKUs with the color and SKU unless the print_sku has an asterisk (*) in it. For more details, please see the Preparing Your Items section below, specifically the print_sku instructions.
Select Inventory or Custom if all of your products are one of these. If selected, the proper value will be passed to Dubow.
Please speak to your Dubow rep for more information about which type you should select if you are unsure.
Default Design Type
Select your default design type.
If you need to select more than one type, you can add design_type directly to the item metadata of each item that will be different from your default selection. For more details, please see the design_type details in the Preparing Your Items section below.
Third Party Shipping ID
If you have a third party shipping account that you want Dubow to use, add the shipping ID here.
Please speak with your Dubow rep for more information about whether or not this field should be set for your account.
After Import, Move To
Select the folder you want orders to be moved into after they are successfully sent to Dubow.
You can use one of the default folders already in your store or create your own. Read the Working with Folders guide for more information.
After Shipment, Move To
Select the folder you want orders to be moved into after Dubow sends shipment details back to Order Desk.
Default Shipment Return Address
Set the default return address that Dubow should use on your shipments.
If you need to customize the return address for certain orders, you can save different return addresses to your Store Settings and then use a rule to set the return address to specific orders. If a return address is not added to the order, the default address set here in the Dubow settings will be used.
For information on adding additional return addresses and applying them to specific orders with a rule, read the Store Settings guide.
Product Settings
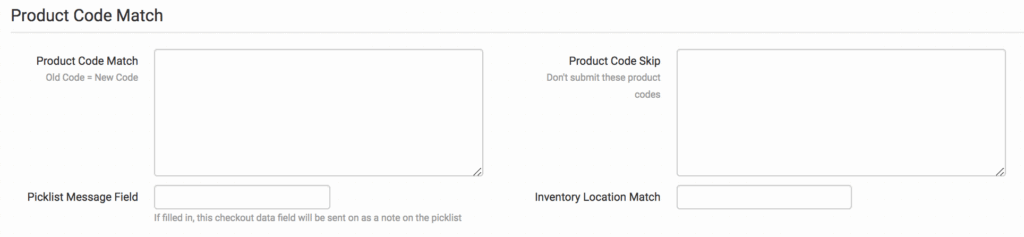
For more information on what these product settings within the Dubow integration are for, please refer to the Print on Demand Product Settings guide.
Shipping Class Match

If the shipping methods you set up in your shopping cart(s) don’t match the shipping method names Dubow uses, they won’t know what methods you intend for them to use. When this happens, the default mail classes applied above will be used instead for all of your orders.
To tell Dubow what methods you want them to use, you will need to match your method names to theirs. This can be done in the shipping class match section. For detailed instructions on setting this up, please read through the shipping class match guide.
Sending Orders to Dubow
Getting your orders ready to send to Dubow will take some set up time. For a detailed walkthrough of how to use Order Desk with your Print on Demand orders, please read through our Print on Demand Fulfillment guide.
Preparing Your Orders
The following fields can be set as checkout data or order metadata to add or change the details that are sent to Dubow about the order.
| Field Name | Field Description |
| ShippingAccount | Third-party shipping account number to be used for the order. |
| PackingSlip | The URL for the PDF to be included as the packing slip on the order. Details here. |
| DateToShip | The Y-m-d date format for the date the order should ship. By default, 26 hours are added to the current time. |
| DateDropDead | The Y-m-d date format for the date the order should reach the customer. By default, this value is not sent. |
| CustomerStore | A 3 to 4 digit number identifying your store/program. This number can be accessed from within your Dubow account. |
| Address5 | Use if you need to pass Address5 to Dubow. |
| BulkShip | Set this to a value of 1 if you want to inform Dubow that the order should undergo bulk shipping. |
If you are unfamiliar with checkout data, see the How to Work with Checkout Data guide.
Preparing Your Items
The following fields can be set as variations or item metadata for each item in an order. Replace the “x” with a value specified in the table, i.e. print_url_2, print_location_2.
| Field Name | Field Description |
| print_sku | The base part number for the garment. The color and size will be added to the end of the SKU where appropriate, so only the base SKU is necessary. Add an asterisk (*) to the SKU if this is a custom product and the size and color should not be appended. The * will be removed before sending to Dubow. |
| print_sku_override | Set to 1. Do not build vendor part numbers from color and size values but just pass through the print_sku value as the complete vendor part number. |
| print_url_ x | The URL for the artwork file. Values 1-8 accepted. If only sending one, print_url can be used. |
| print_preview_ x | The URL for the preview of the final product. Values 1-8 accepted. If only sending one, print_preview or image can be used. |
| print_location_ x | Each design also must include a print location. Valid values are Full Front, Full Back, Rt. Sleeve Above Cuff, Left Sleeve Above Cuff, Back Yoke, Left Front Chest, Right Chest. Values 1-8 accepted. |
| print_design_id_ x | If Dubow has given you a Design ID for your product, use this field with the ID as the value rather than using a print_url. Values 1-8 accepted. |
| print_design_code_ x | If you are sending a print url (not a Design ID), use this to send a customer design code with your products. If this field is not used, no customer design code will be sent to Dubow. Values 1-8 accepted. |
| colorway_ x | The Colorway ID (for embroidery thread color) for the print. Values 1-8 accepted. |
| design_type_ x | The design type for the item if different from the default setting. Options are Embroidery, LaserEtch, Applique, DigitalPrint, ScreenPrint, HeatTransfer, DyeSublimation, ReverseApplique, DistressedApplique, HG CYLINDRICAL, HG Dye Sublimation, HG FLAT, Poster, STICKER, Pinback Button and Magnet. Values 1-8 accepted. |
| NoDecoration | Use this field with a value of 1 to indicate to Dubow that there will be no decoration for the item. |
| product_name_field | Use to set how to identify the product’s name. Options are ProductName (default) and CustomerProductName. |
| color | The color of the garment. An attempt will be made to match color set here to Dubow’s color abbreviation list. |
| size | The size of the garment. |
| print_mill | Custom procurement only, to pass a mill for the item. |
| procurement_type | The type of procurement for the garment if different from the default setting. Options are Custom, Contract, or Inventory. If you use this field, the size and color won’t be appended unless add_size_color=1 is also set on the item. |
| custom_text_x | To add custom text ( e.g. a name or uniform number). This will go in a single location and you must include custom_text_details and custom_text_location as well. You can append a 1 – 8 to add more than 1 line. |
| custom_text_details | This field holds the details of how your custom text will be printed. You will need to include a comma-separated list of values in this order: Font, Color, Position, Width, Height, Notes. Notes are optional. Here’s an example of how this field would look: Arial, Black, Front, 3, 8, Optional Note Text |
| custom_text_location | Full Front, Left Chest, Back, etc. |
| retail_price | Retail price of the item. |
| harmonized_code | HS Code for the item. |