> For the complete documentation index, see [llms.txt](https://help.orderdesk.com/llms.txt). Markdown versions of documentation pages are available by appending `.md` to page URLs; this page is available as [Markdown](https://help.orderdesk.com/guided-walkthroughs/integration-specific-walkthroughs/how-to-connect-shopify-with-the-custom-app-method.md).
# How to Connect Shopify with the Custom App Method
There are two ways to connect Shopify to Order Desk.
If you’re an admin on the Shopify account, you can connect Shopify directly from within Order Desk or Shopify. For that setup, see the [**Shopify integration guide**](/integration-setup-guides/sales-channels/shopify-integration.md).
If you’re not an admin on the Shopify account but still need access to orders from the store, you can use the **custom app** method instead. This is helpful for fulfillment services, vendors, or other teams who need to pull Shopify orders into Order Desk but don’t have access to the Shopify admin account.
With this method, the Shopify admin creates a custom app in Shopify and shares the connection details with you. This gives Order Desk access to the store’s order data without giving you direct access to the Shopify admin account.
This guide explains how to connect Shopify to Order Desk using the custom app method.
{% hint style="info" icon="lightbulb" %}
This process involves two roles: the person setting up the Shopify integration in Order Desk and the Shopify admin. The steps in this guide are labeled to show who should complete each part.
{% endhint %}
### Step 1: Start the Custom App Connection in Order Desk
In the Order Desk store where Shopify should be connected, go to this URL:
```
https://app.orderdesk.me/integration/shopify?enable-custom-app=1
```
You’ll be asked to enter three details from Shopify:
* Shop Name
* Client ID
* Client Secret
The Shopify admin will need to create a custom app in Shopify first, then share these details with you. You can share the following steps with them.
### For the Shopify Admin
**Create the Custom App in Shopify**
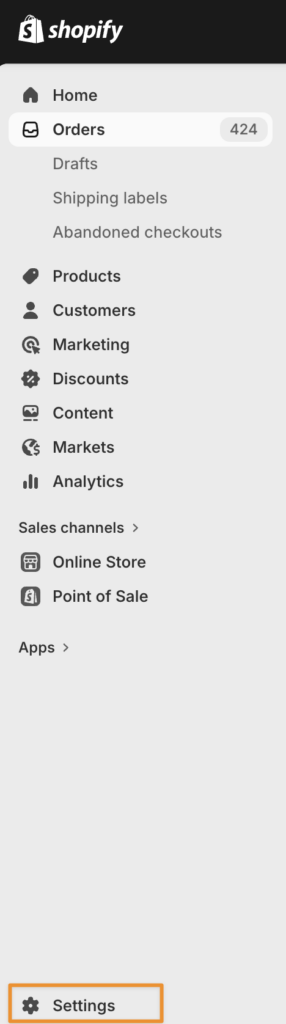
Log in to Shopify and click **Settings** from the dashboard:
From the Settings page, click **Apps**, then click **Develop apps**.

This will open the app development area. From there, click **Build apps in Dev Dashboard**.

In the Dev Dashboard, click **Create app**. The app can be given any name. After adding a name, click **Create**:

**Configure the App**
Shopify will ask for an App URL. Add this URL in that field:
```
https://shopify.dev/apps/default-app-home
```

{% hint style="info" %}
Before continuing, turn off the option to **Embed app in Shopify admin**.
{% endhint %}
In the **Access Scopes** section, copy and paste the following scopes:
```
read_all_orders, write_assigned_fulfillment_orders, write_customers, write_draft_orders, write_fulfillments, write_inventory, read_locations, write_merchant_managed_fulfillment_orders, write_orders, read_payment_terms, write_products, read_shipping, write_third_party_fulfillment_orders
```
{% hint style="info" %}
These scopes are necessary to help Order Desk manage orders from your store correctly without errors.
Some users might run into a ***Contains invalid scopes*** error when trying to add `read_all_orders` access. If you run into that error, check out this [**Shopify help thread**](https://community.shopify.com/t/getting-read-all-orders-permission-in-custom-app/320928/2) to learn how to get the access enabled for your account.
{% endhint %}
Once the scopes have been added, scroll to the bottom of the page and click **Release**. On the next page, no extra details are needed. Click **Release** again to confirm.
After that, Shopify should redirect you back to the Dev Dashboard.

**Install the App**
From the Dev Dashboard, click the name of the app you created. Then click the **Install app** button on the far right.

You’ll be redirected to a new tab where you can select your store, then sent back to Shopify to confirm the installation. Click **Install**.

After the app is installed, Shopify will show a confirmation page.

**Gather and Share the Credentials**
With these steps completed, you can now share the following details with the person connecting Shopify in Order Desk:
* The **Shop Name**, which is the same store domain used in the earlier step.
* The **Client ID** and **Client Secret**. You can find these by going back to the App Dev Dashboard, opening the app, and clicking **Settings**.
### Step 2: Complete the Connection in Order Desk
As the person connecting Shopify to Order Desk, return to the connection screen you opened in Step 1, then paste in the details provided by the Shopify admin:
* Shop Name
* Client ID
* Client Secret
Once all three fields are filled in correctly, click **Connect**. The Shopify integration should now be active in your Order Desk store.
### Set Up the Integration Preferences
Once connected, you can set up your integration preferences by [**following the steps in this guide**](/integration-setup-guides/sales-channels/shopify-integration.md#shopify-settings).
---
# Agent Instructions
This documentation is published with GitBook. GitBook is the documentation platform designed so that both humans and AI agents can read, navigate, and reason over technical content effectively. Learn more at gitbook.com.
## Querying This Documentation
If you need additional information that is not directly available in this page, you can query the documentation by asking a question.
Perform an HTTP GET request on the following URL with the `ask` and `goal` query parameters:
```
GET https://help.orderdesk.com/guided-walkthroughs/integration-specific-walkthroughs/how-to-connect-shopify-with-the-custom-app-method.md?ask=&goal=
```
`ask` is the immediate question: it should be specific, self-contained, and written in natural language.
`goal` is what the user is ultimately trying to achieve, the reason they need the answer. Sharing it helps GitBook give you a better, more relevant answer. A goal is most helpful when it describes the outcome the user wants rather than restating the question. For example, with `ask=how do I create an API token`, a goal like `automate deployments from our CI pipeline` lets GitBook tailor the answer to that use case.
The response will contain a direct answer to the question and relevant excerpts and sources from the documentation.
Use this mechanism when the answer is not explicitly present in the current page, you need clarification or additional context, or you want to retrieve related documentation sections.